SreeragJune 9, 2026
A retail business runs on its relationships with customers. Odoo 19's Point of Sale module makes it remarkably straightforward to build those relationships right from the billing counter — you can register a new customer mid-transaction, pull up an existing one in seconds, and have their full purchase history at your fingertips without leaving the POS screen.
This guide walks you through the entire customer management workflow inside Odoo 19 POS, from the initial setup to tracking orders over time.
Customer records in Odoo 19 POS aren't isolated from the rest of the system — they share the same contact database used across Sales, Accounting, and CRM. To access them from the POS backend, go to Orders → Customers. Here you'll find a list of all existing contacts tagged as customers, along with the option to create new ones.
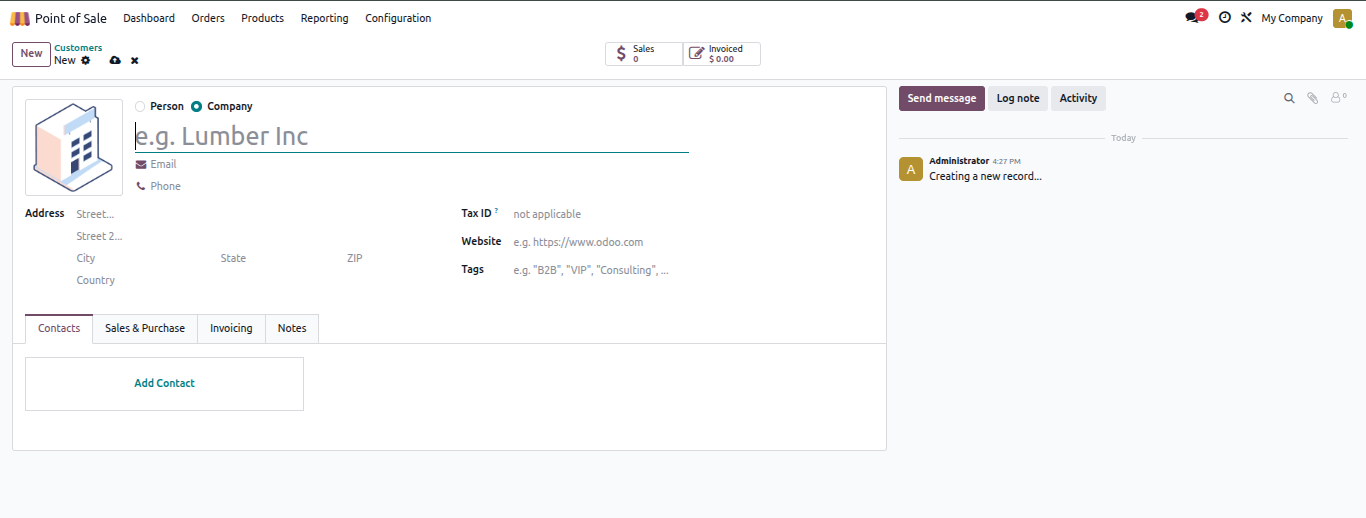
Click New to open a fresh customer form. The first decision you'll make is whether this contact is an Individual (Person) or a Company — this determines how certain fields behave and how the contact is displayed across the system.
From there, fill in the core details:
If the person belongs to a company already in your system, their company's address will pre-fill automatically, saving you manual entry.
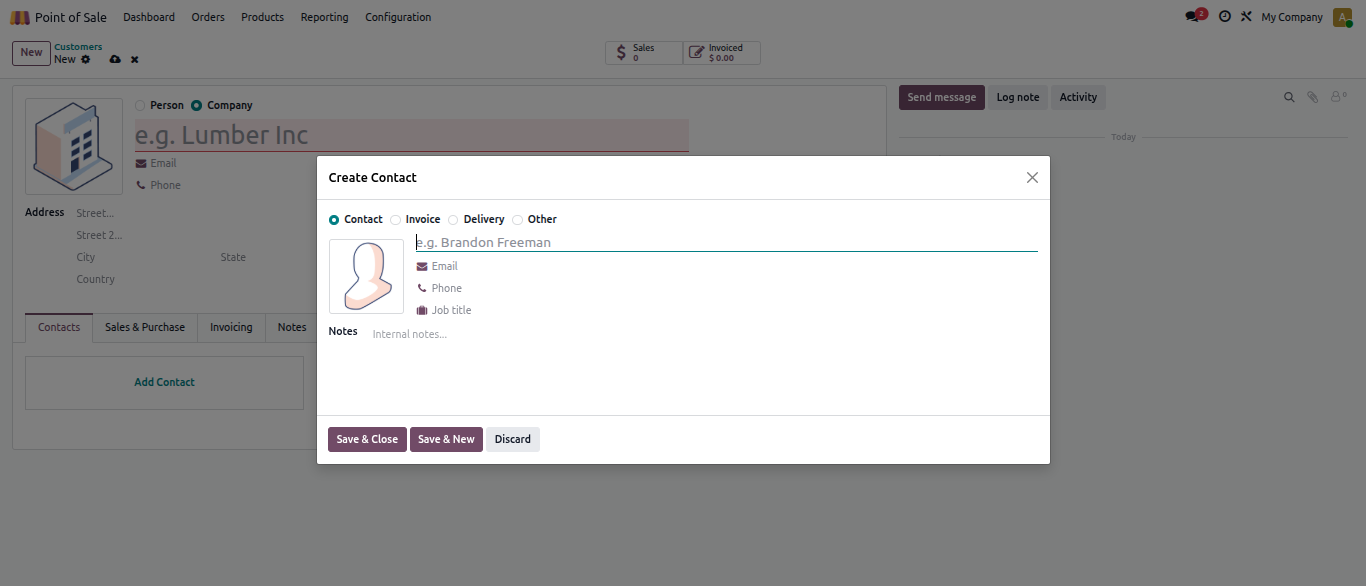
A single customer often needs more than one address — a head office for invoicing, a warehouse for deliveries, or a home address for personal orders. Rather than creating duplicate records, Odoo handles this cleanly through the Contacts & Addresses tab on the customer form.
You can add as many addresses as needed, each tagged with its purpose (delivery, invoice, other), all linked to the same customer profile. This keeps your contact list clean and your shipping and billing logic accurate.
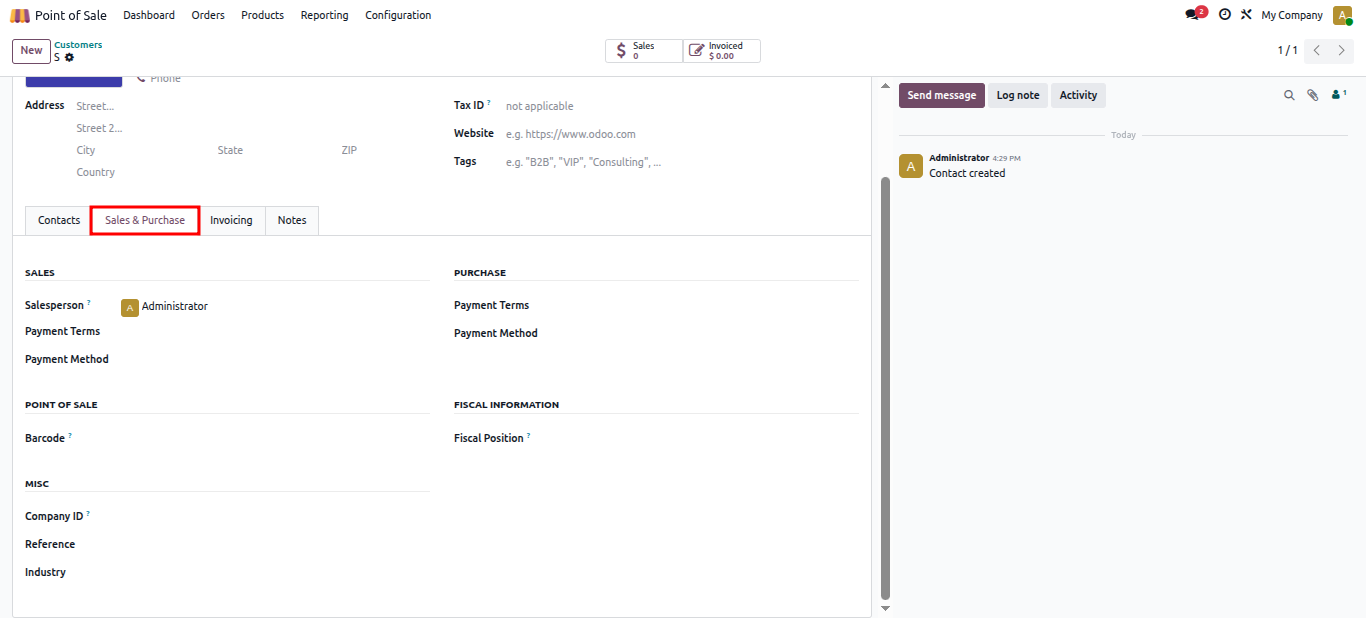
The Sales & Purchase tab is where you define how Odoo should handle transactions with this customer. It's split into several logical sections:
Sales — Set the default salesperson, payment terms, applicable price list, delivery method, and Avalara tax code if you're using automated tax compliance.
Purchase — If this contact is also a vendor, configure the default buyer, payment terms, and whether Odoo should send receipt reminders.
Point of Sale — Assign a barcode to the customer. This lets cashiers scan the customer's card or ID at checkout to instantly pull up their profile and link them to the transaction.
Fiscal Information — Define the customer's fiscal position, which controls how taxes are mapped for their transactions depending on their location or tax status.
Miscellaneous — Store additional reference identifiers like Company ID, Citizen ID, or any internal reference codes your business uses.
Inventory — Specify default source and destination stock locations when items are being delivered to or received from this contact.
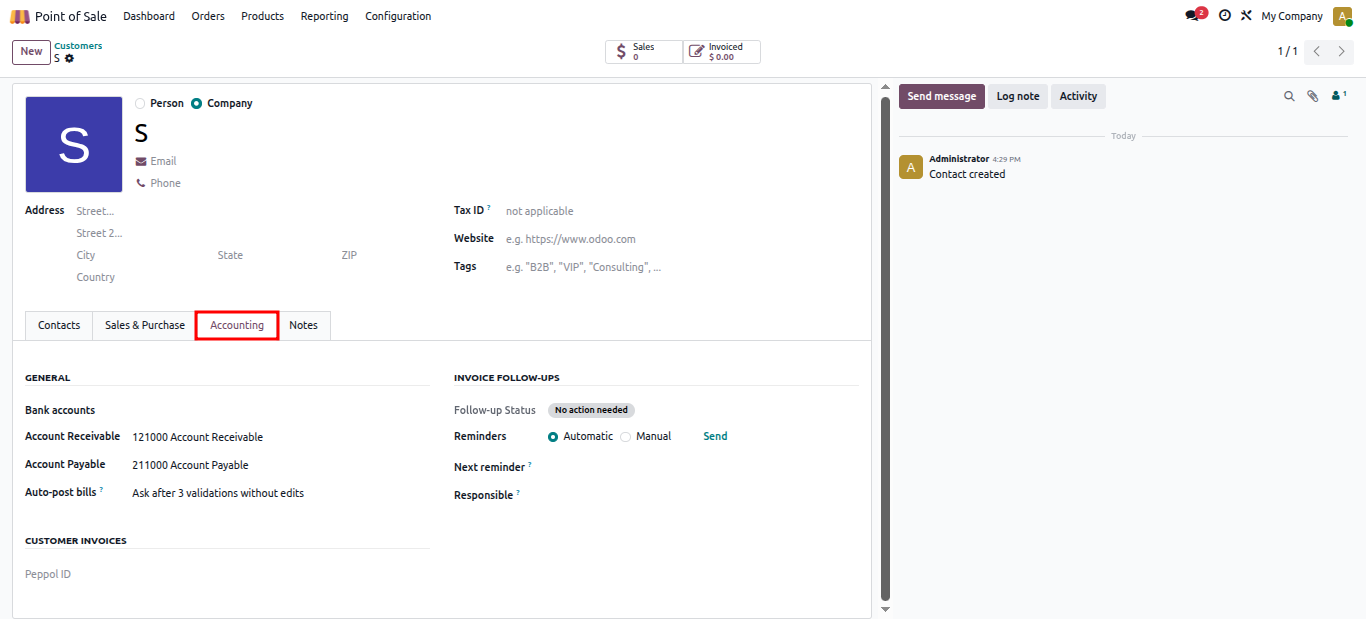
The Accounting tab governs how Odoo handles the financial side of your relationship with this customer.
Bank Accounts — Link one or more bank accounts to support direct transfers or payment processing.
Account Receivable / Payable — Map the correct ledger accounts. The receivable account tracks what the customer owes you; the payable account is relevant if the same contact is also a supplier.
Auto-Post Bills — This setting controls how vendor bills from this contact get processed:
Ignore Abnormal Invoice Amount / Date — These toggles suppress system warnings when invoice amounts deviate significantly from expected values or when invoice dates appear unusual (such as backdated entries). Useful for customers with irregular billing cycles.
Peppol ID — For businesses operating in countries that mandate electronic invoicing, this field stores the customer's endpoint identifier on the PEPPOL network, ensuring compliant digital invoice delivery.
Invoice Follow-Up Section — This is your collections management panel. You can see the customer's current payment status, choose between manual or automatic reminder scheduling, fire off an immediate follow-up email, view the date of the next scheduled reminder, and assign an internal team member to own the relationship for overdue invoice purposes.
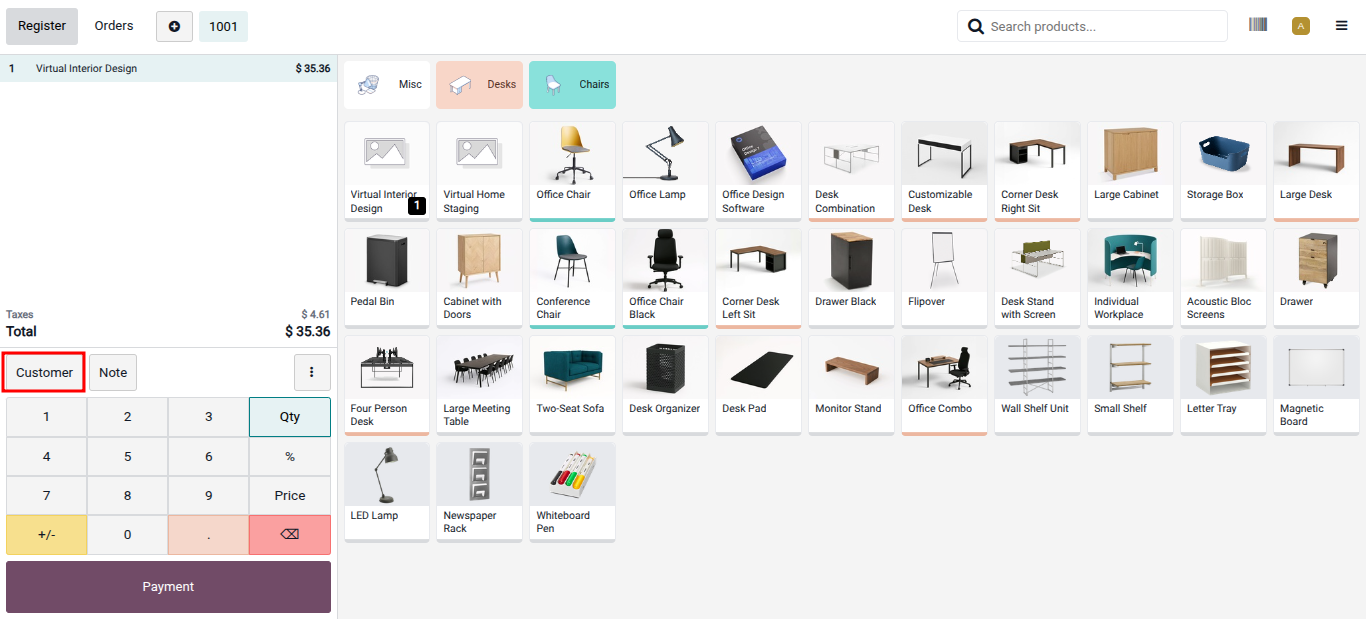
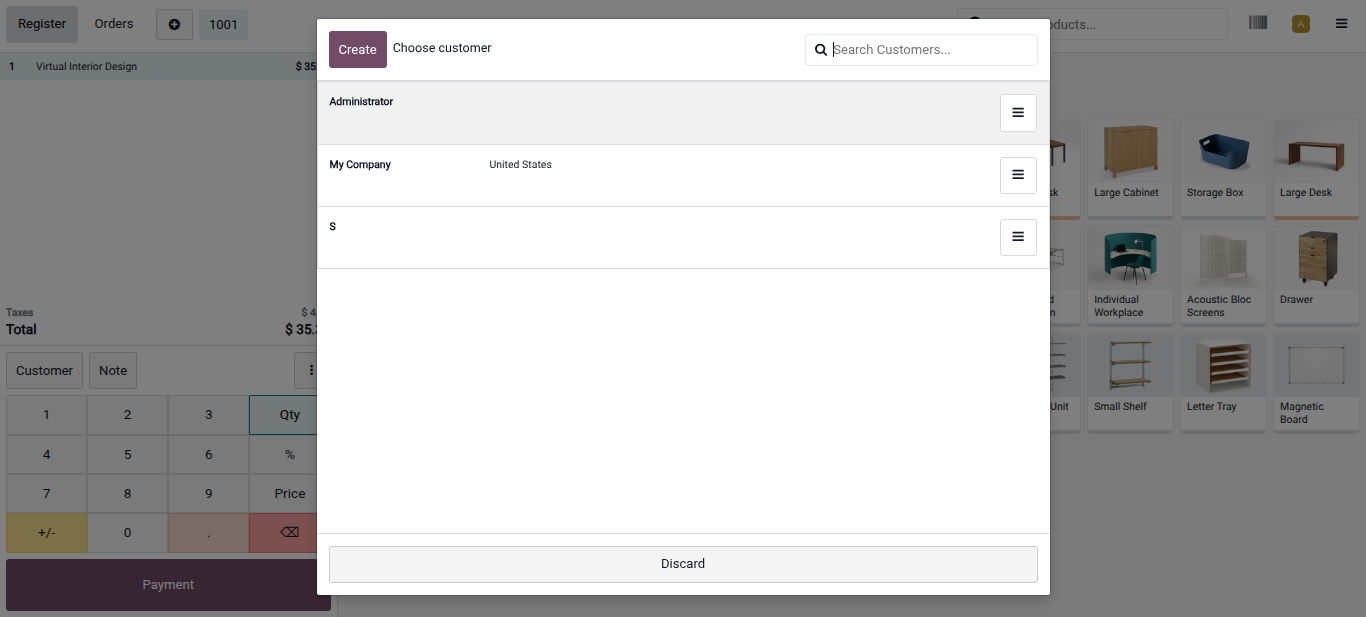
When you're actively processing a sale at the POS terminal, tap the Customer button on the order screen. A pop-up appears showing your existing customer list with a search bar. You can either search for and select an existing customer, or click Create to add a new one on the spot without leaving the transaction.
Once linked, the customer's name appears on the order, and that transaction becomes part of their permanent record in Odoo.
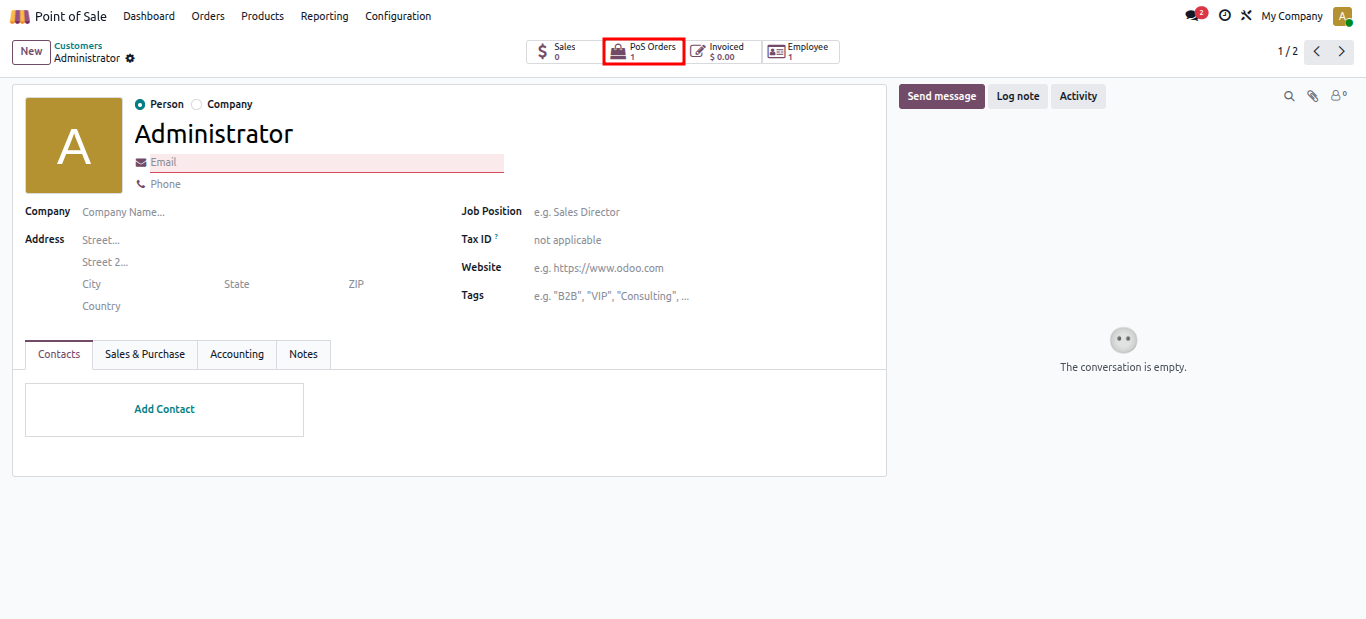
After a customer has been attached to one or more POS orders, their contact profile gains a POS Orders smart button at the top of the page. Clicking it opens a detailed view of every transaction that customer has ever made through your point of sale — dates, amounts, products, and payment methods all in one place.
This history is invaluable for things like processing returns, understanding buying patterns, offering loyalty rewards, or simply providing better service when a returning customer walks through the door.
Odoo 19's Point of Sale gives you a complete customer management system that works in real time, right at the counter. Whether you're adding a brand-new customer during a busy sale, updating an existing profile with a new address, or reviewing someone's purchase history before a follow-up call — everything is connected, synchronized, and accessible without switching between modules.
The result is a faster checkout experience, better data quality, and the foundation for meaningful, long-term customer relationships.


0