ArchanaNov. 6, 2025
When employees incur expenses like travel, accommodation, or other project-related costs, businesses can recover these by reinvoicing clients.
Using Odoo’s Expenses app, companies can efficiently track, manage, and reinvoice these expenses while linking them to specific projects for accurate billing and streamlined financial operations. This setup allows efficient tracking, submission, and reinvoicing of employee expenses to the correct client, ensuring accurate cost allocation and smooth project financial management.
To get started, simply install the Expenses application from the Apps menu.
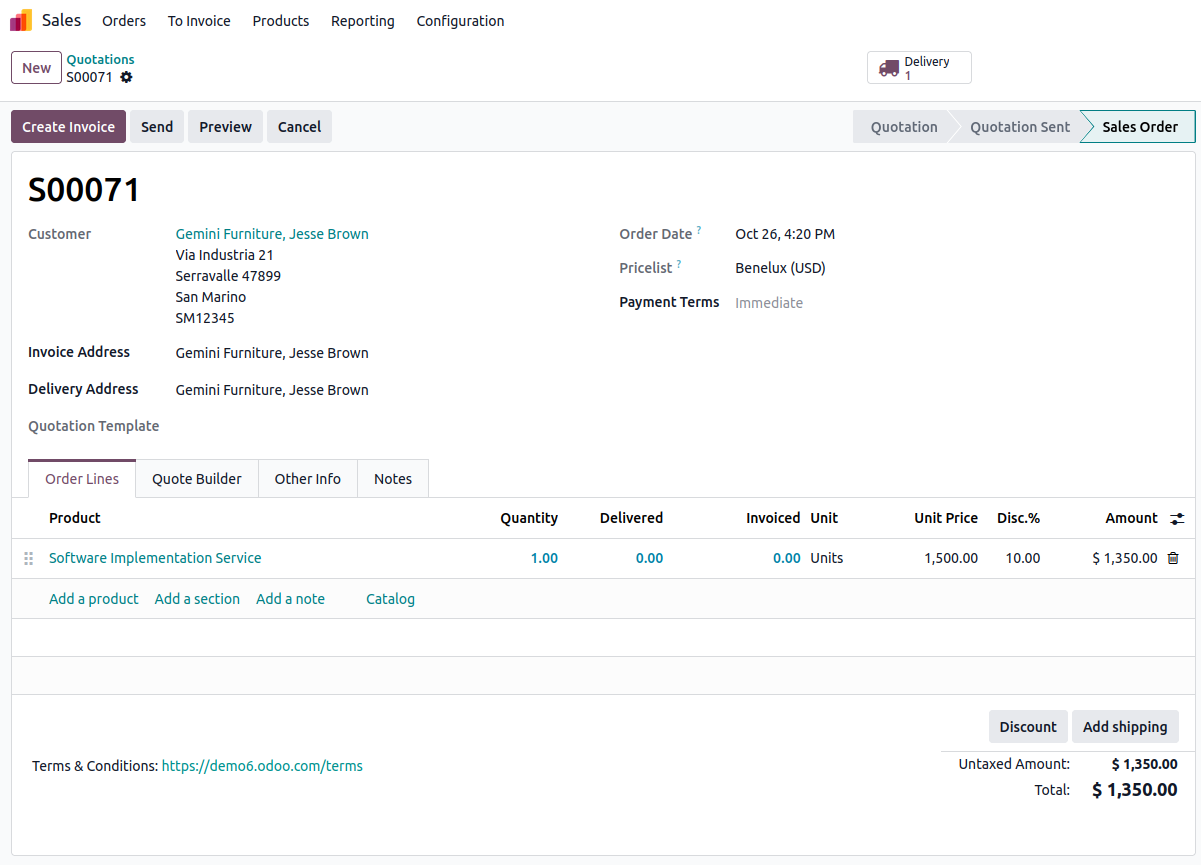
To reinvoice expenses in Odoo, create or use a confirmed sales order. In the Sales app, click New, select the customer, add products in Order Lines, and click Confirm to finalize.
After confirming the sales order, open the Expenses app to record and track expenses for client reinvoicing.
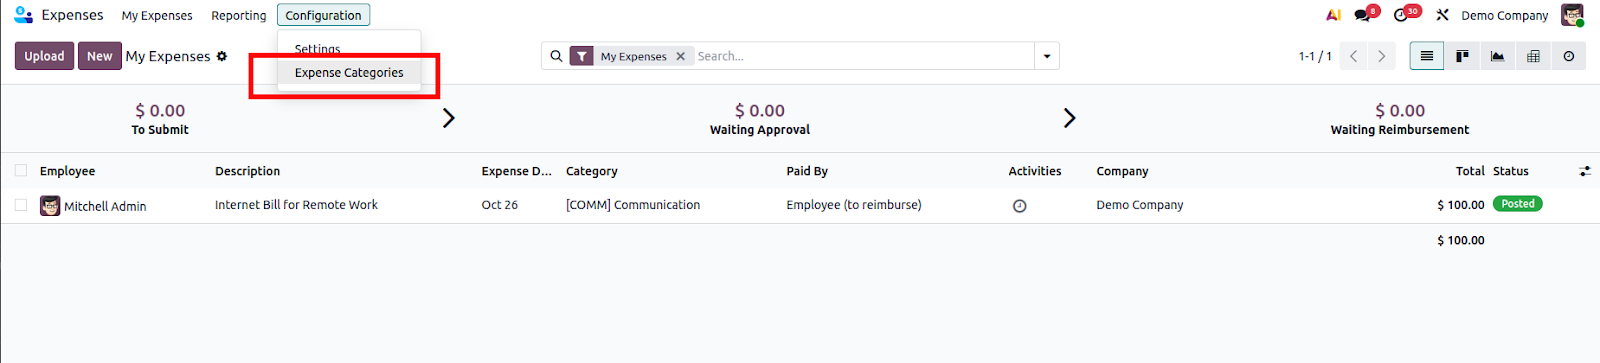
To enable reinvoicing, configure Expense Categories under Configuration → Expense Categories and set the appropriate reinvoicing rules.
To ensure accurate and automated client billing, link expense categories to reinvoicing rules in Odoo.
Navigate to Expenses → Configuration → Expense Categories, then create or edit a category and enable the appropriate customer to reinvoice settings.
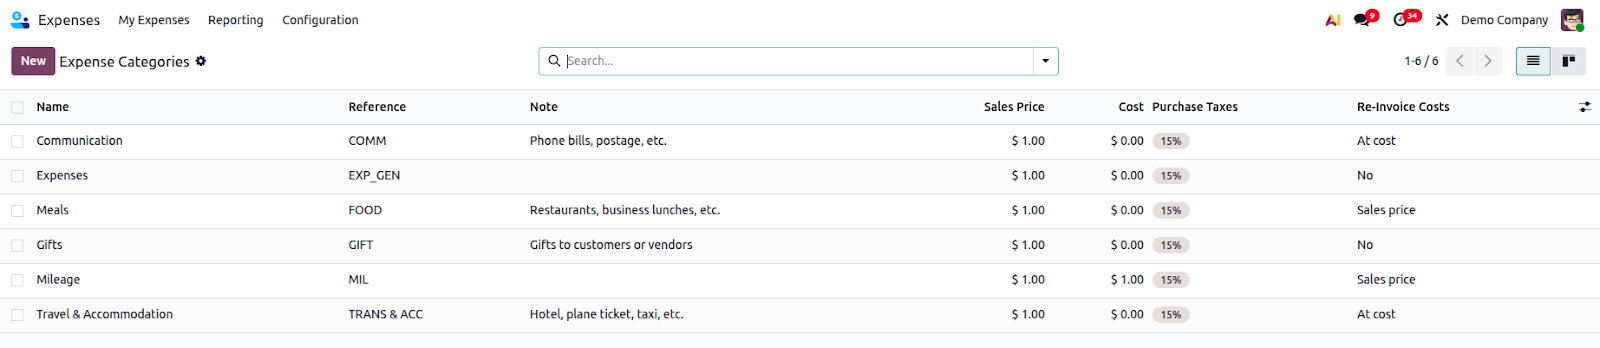
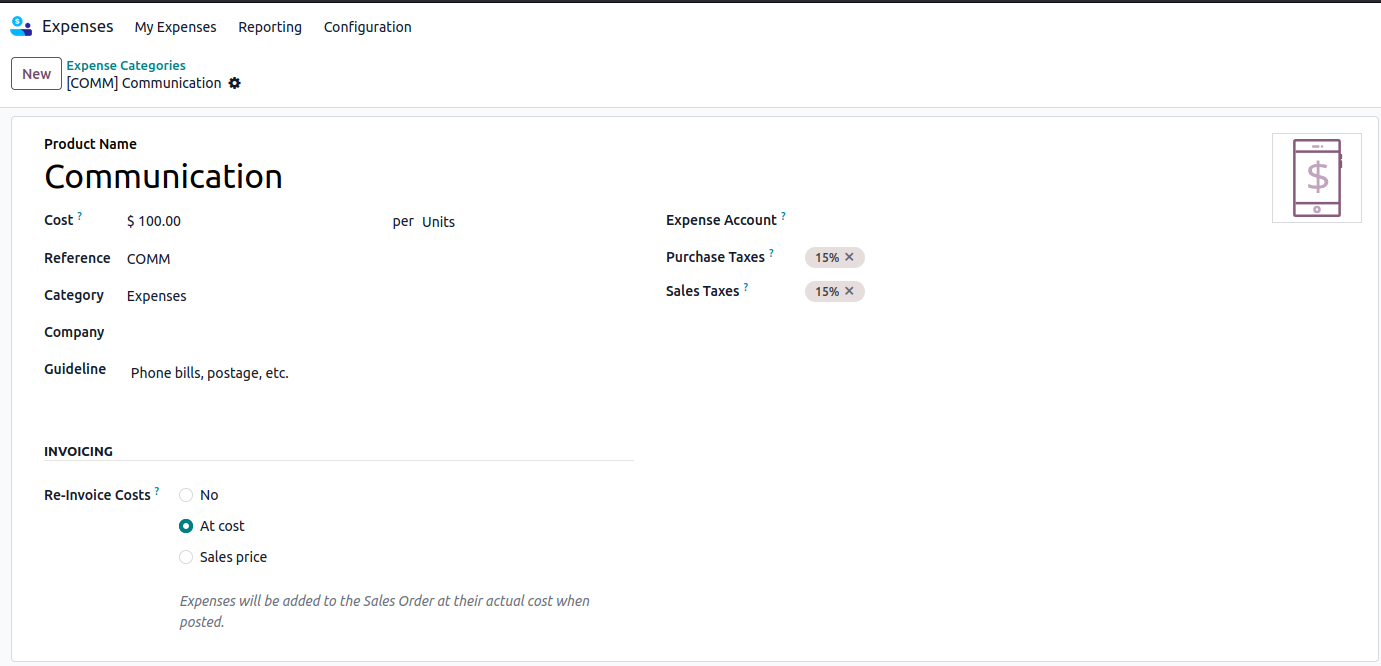
Create or edit a category, setting Name, Cost, Reference, Category, Company, and other fields as needed. Save to configure.
Then, in the Invoicing section, enable Re-invoice Costs to define how expenses are billed back to the customer, ensuring accurate cost linking and reinvoicing.
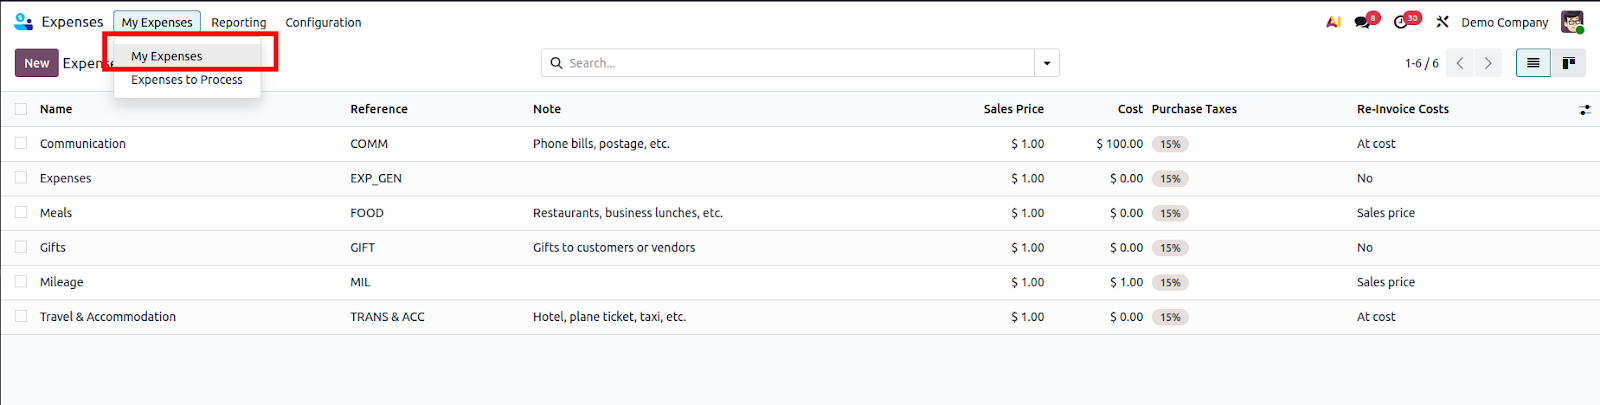
To record an expense in Odoo for reinvoicing, navigate to Expenses → My Expenses → My Expenses.
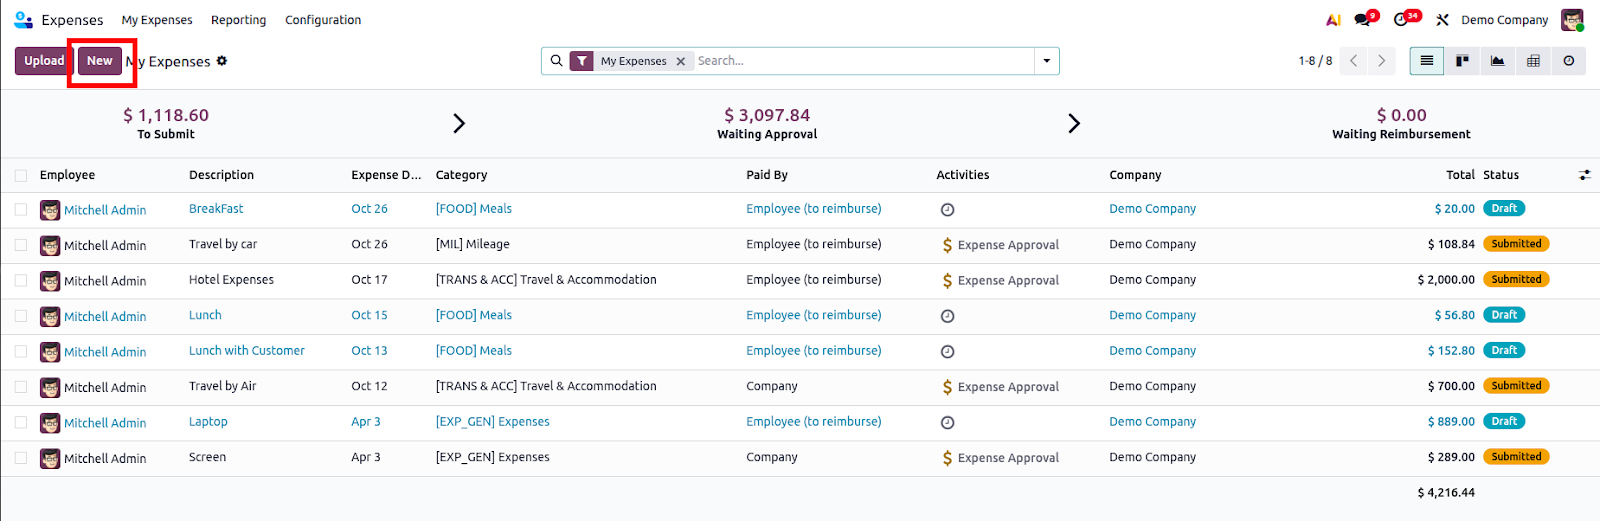
From the Expenses dashboard, click "New" to open a blank expense form.
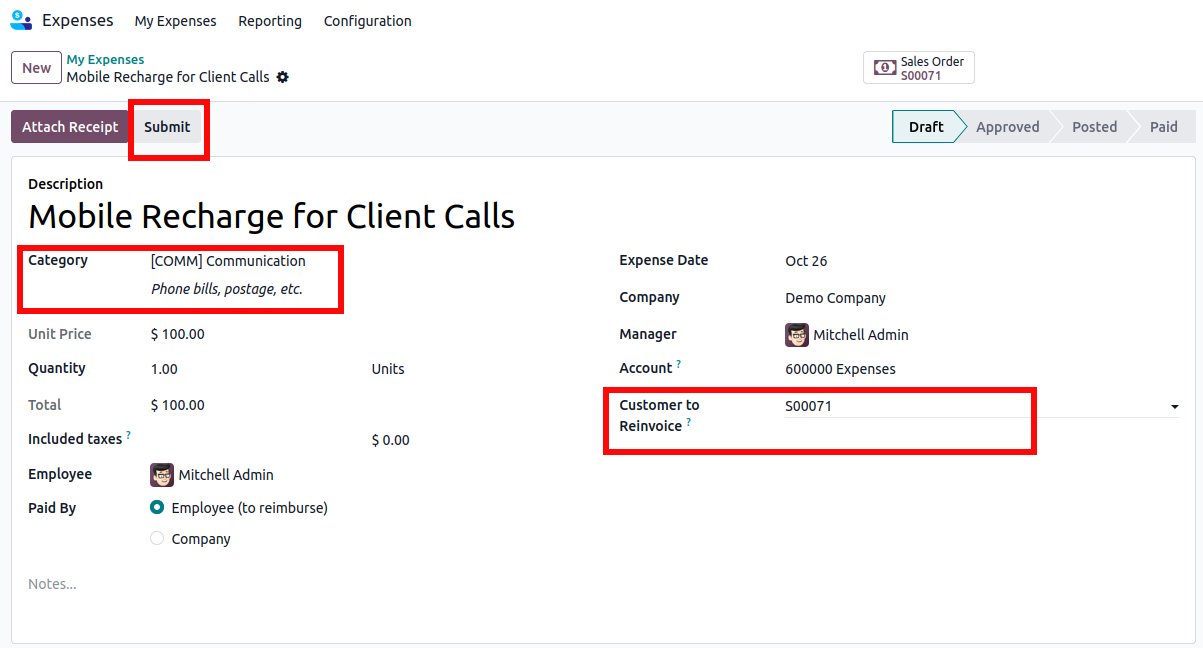
In Odoo’s expense form, enter a Description for reference, choose an Expense Category, and enter the Total amount. Specify Included Taxes, and Odoo will auto-calculate the taxed value.
Select the Employee and choose Employee (to reimburse) in the Paid By field for out-of-pocket expenses. Optionally, add a Bill Reference. The Expense Date and Account fields fill automatically but can be edited.
For reinvoicing, select the related Customer to Reinvoice (sales order). Optionally, update Analytic Distribution, Company, or add Notes as needed.
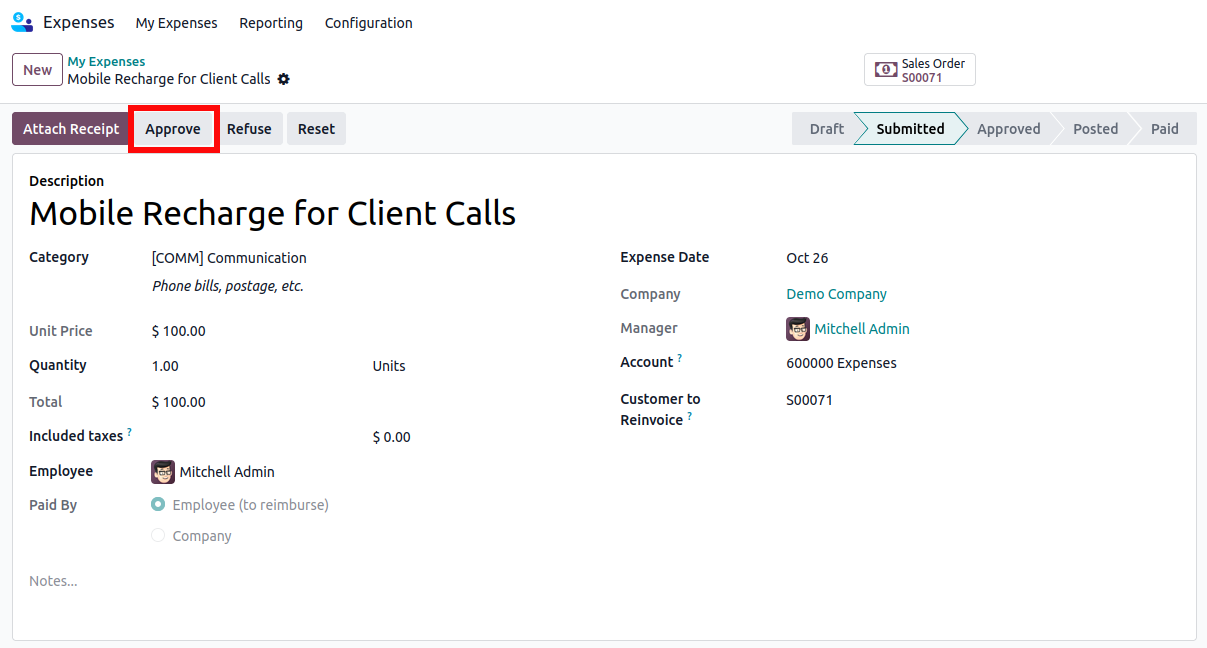
To add a receipt in Odoo, click Attach Receipt to upload a physical or digital copy. If no receipt is needed, click Create Report to finalize the expense report. Review the details in the Expense Report Summary, then click Submit for approval. The manager verifies the report and clicks Approve to confirm.
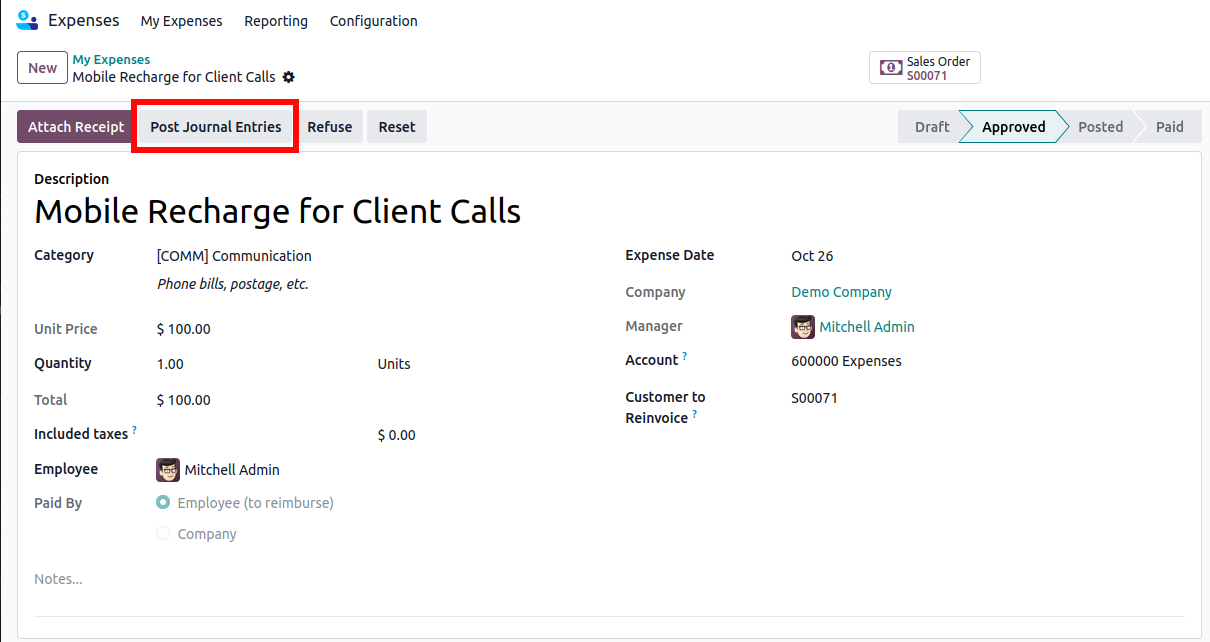
After the manager approves the Expense Report Summary in Odoo, clicking Post Journal Entries posts the entries and hides the button. The Analytic Distribution column in the Expenses tab then auto-fills with the sales order from the Customer to Reinvoice field.
To reinvoice the expense to the customer in Odoo, navigate to the main Odoo dashboard and select the Sales app. Choose the relevant sales order linked to the expense.
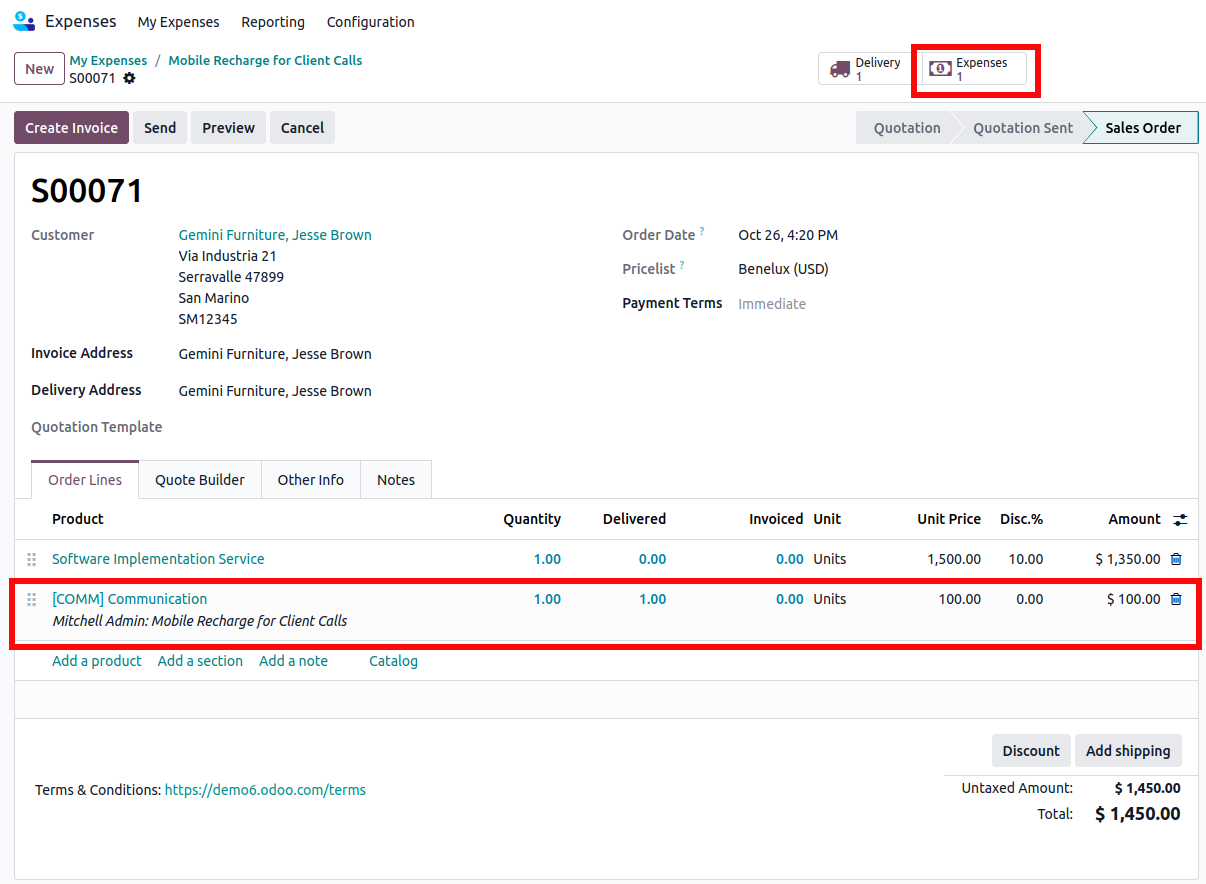
On the sales order form, the newly configured expense will appear in the Order Lines tab, with the Delivered column populated, indicating it is ready for invoicing.
To finalize reinvoicing in Odoo, open the sales order and click Create Invoice. In the pop-up, keep the default Regular invoice option and click Create Draft Invoice.
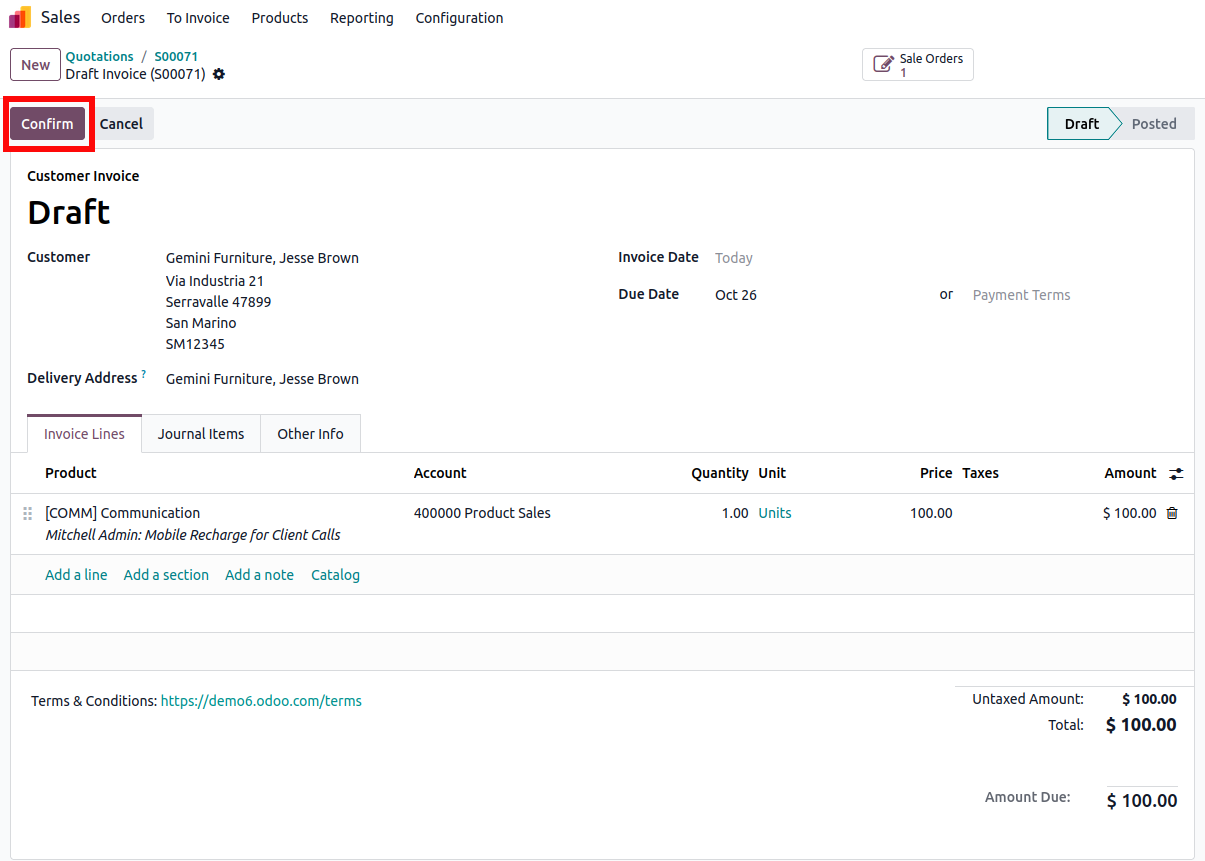
This generates a Customer Invoice Draft displaying the expense in the Invoice Lines tab. Verify the details and click "Confirm" to move the invoice from Draft to Posted status.

In Odoo, click Send & Print to review or edit the invoice message and PDF, then send it to the customer and download the PDF. After payment, open the Customer Invoice, click Register Payment, verify the auto-filled fields, and click Create Payment.
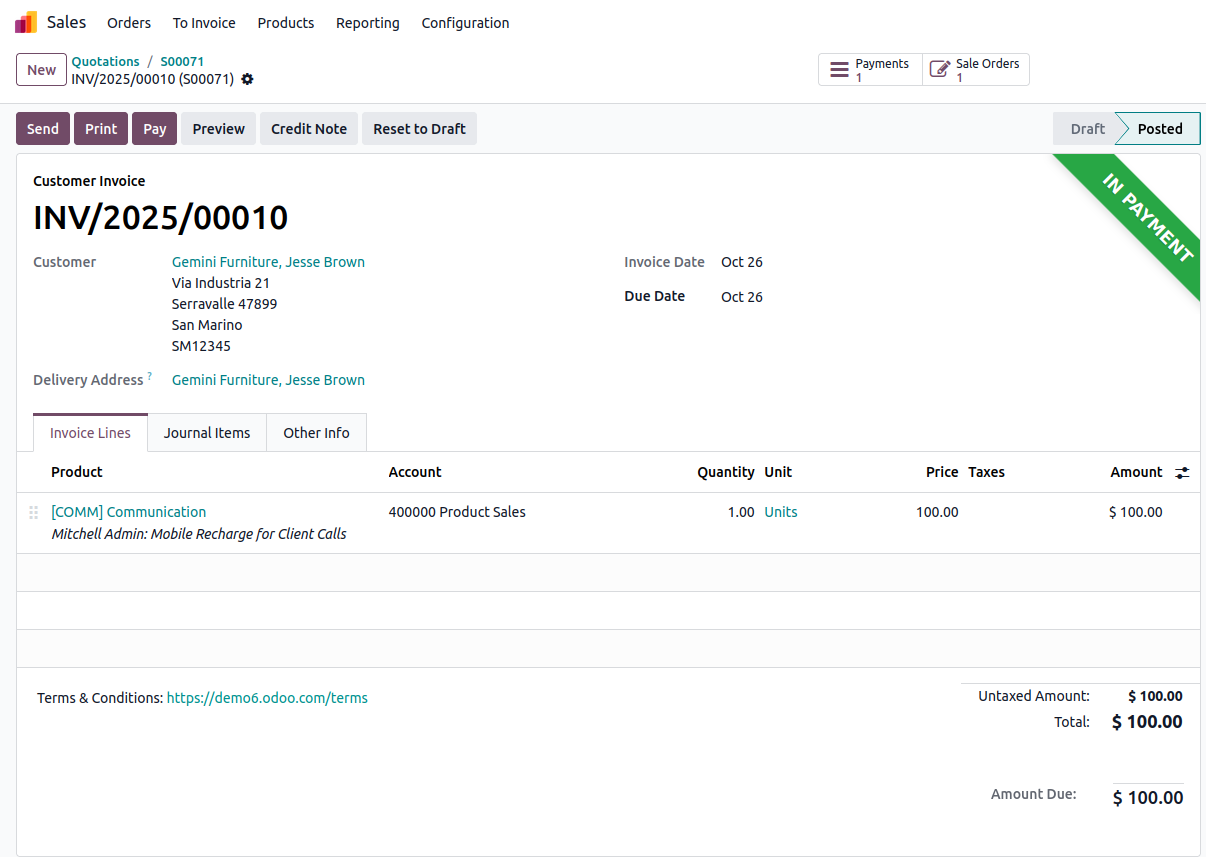
The pop-up closes, and a green "In Payment" banner appears on the invoice, indicating full payment and completing the workflow.


0