SagilFeb. 16, 2026
Live Chat in Odoo 19 lets you talk to visitors directly from your website. When someone has a question, they can start a chat immediately instead of filling out a contact form and waiting for a reply.
For small teams and growing businesses, this makes a real difference. Many visitors leave a website simply because they don’t get quick answers. With Live Chat, you can respond while they are still browsing.
In Odoo 19, the Live Chat feature is built to work smoothly with your Website app. You don’t need any external tools. Once configured, your support team can manage conversations directly from the Odoo backend.
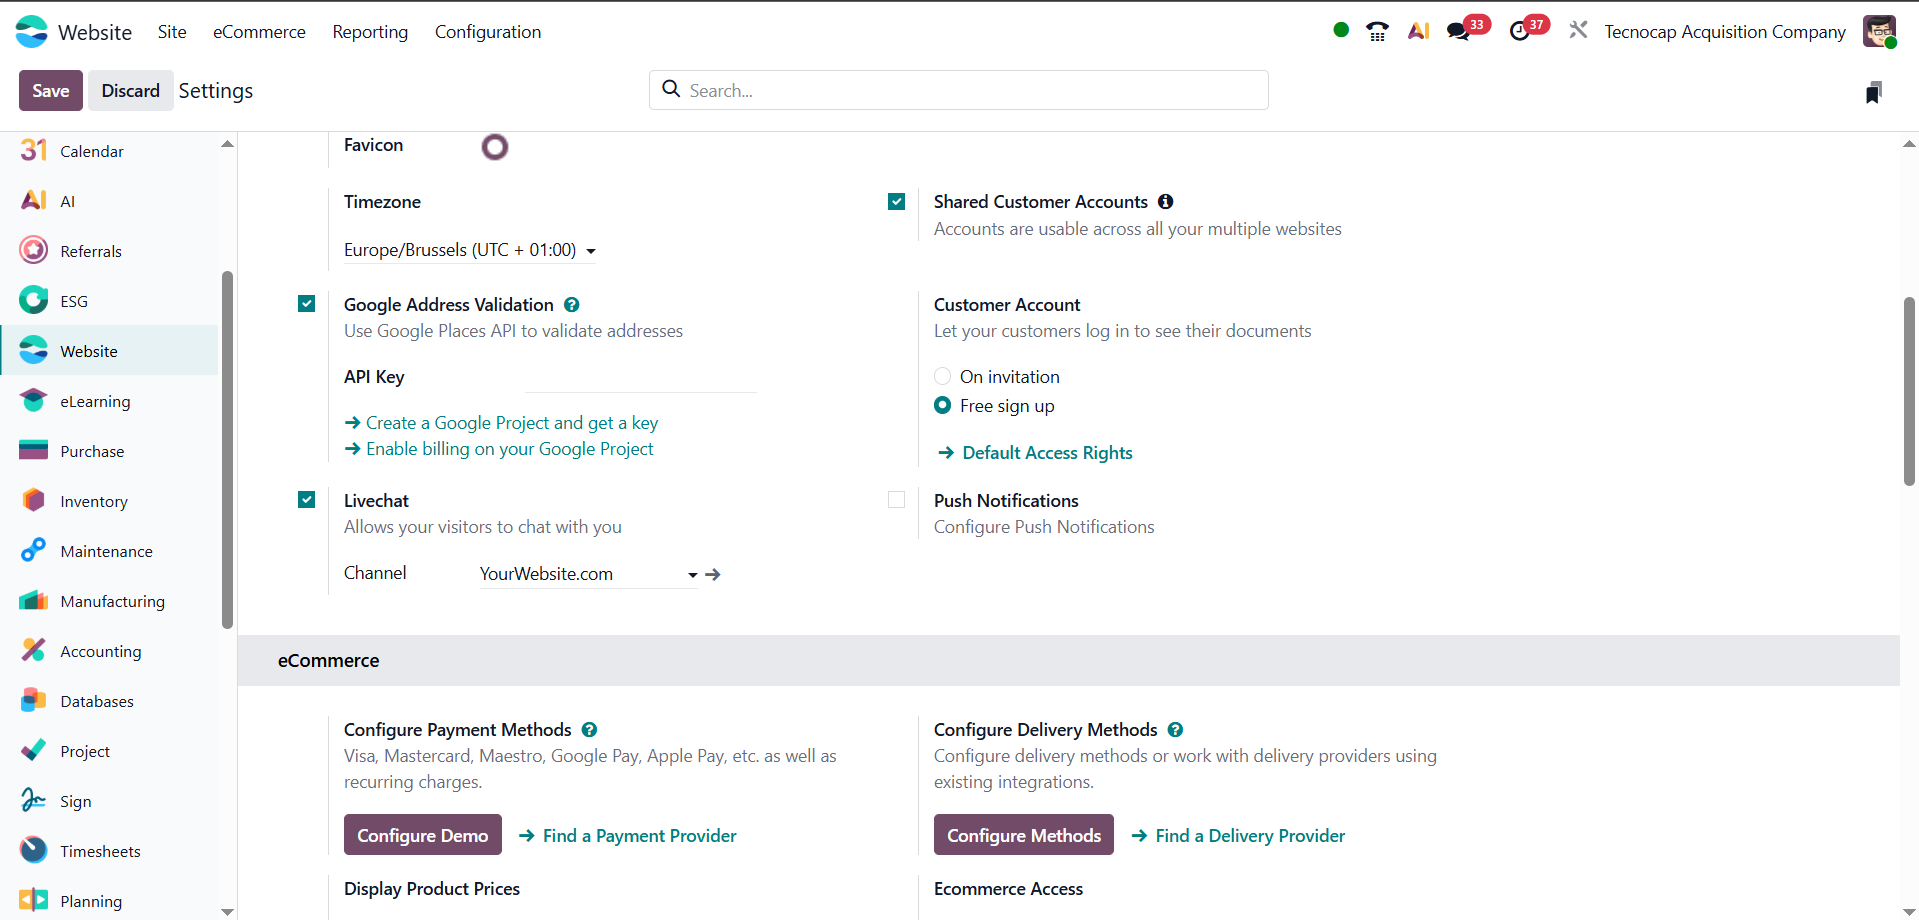
To begin, you’ll first create a Live Chat channel. This channel controls how the chat appears on your website and which operators handle incoming messages. You can enable the feature from the Website settings, and then complete the configuration from the Live Chat app.
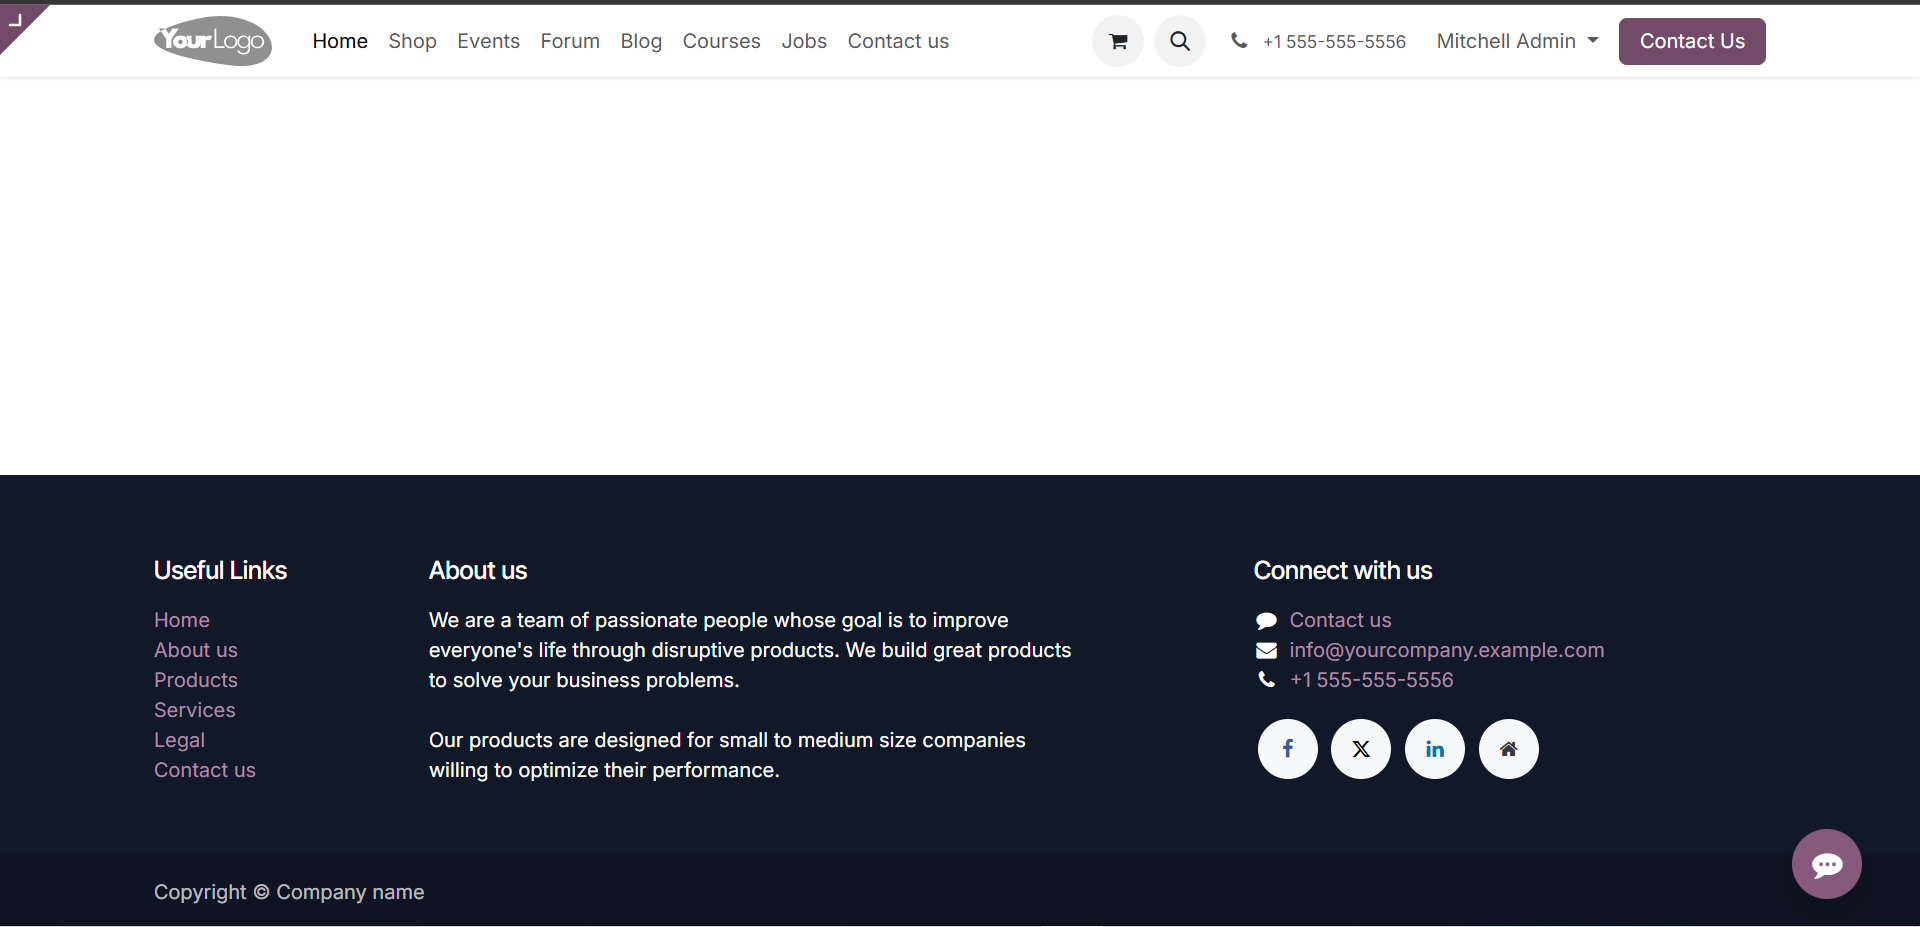
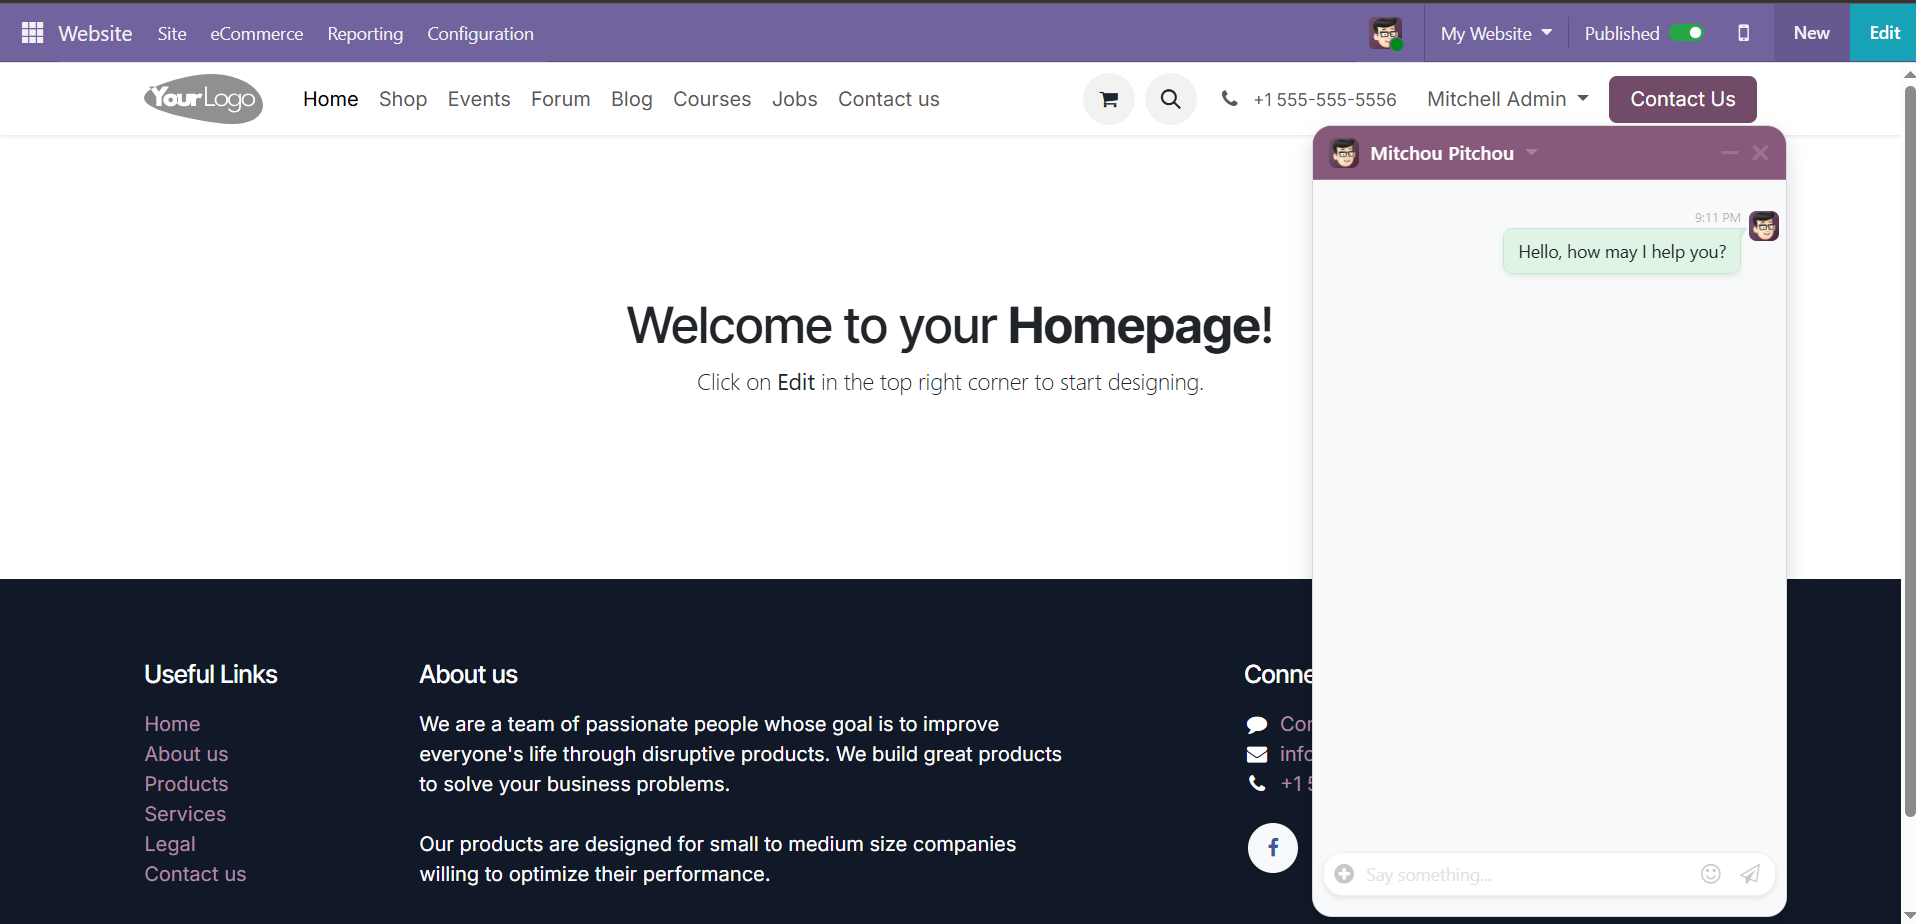
Once Live Chat is enabled, a small chat button appears on your website, usually at the bottom corner of the page. Visitors can click it and start typing their questions immediately.
There is no need for them to log in or fill out a long form. The conversation opens in a simple chat window, which makes it easy and familiar for most users.
From experience, this small widget makes a big difference. Many visitors prefer asking a quick question instead of searching through multiple pages. With Live Chat active, they can reach your support team at the exact moment they need help.
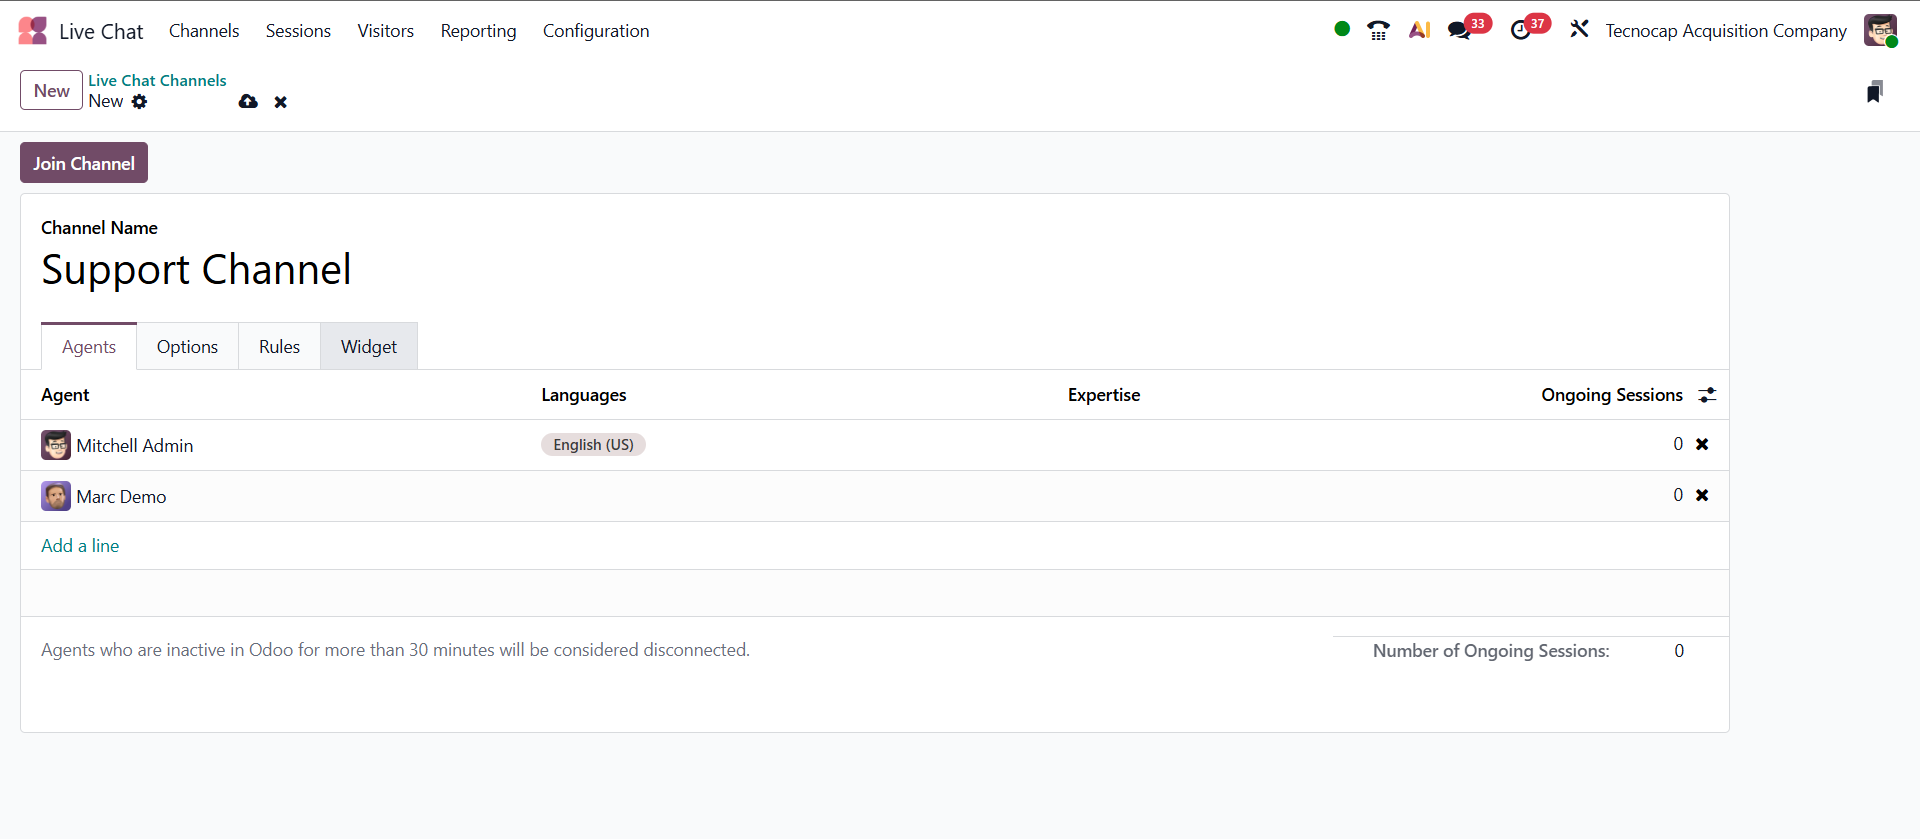
After enabling the feature, the next step is to create a Live Chat Channel from the Live Chat app. Think of this channel as the bridge between your website visitors and the team members who will reply to their messages.
Inside the channel form, you will find the Operators section. This is where you choose the users who should receive incoming chats. Click Add, select the relevant support users, and save the changes.
You can assign more than one operator to the same channel. In real projects, this is important because chats rarely come one at a time. With multiple operators, conversations are distributed automatically, response time stays low, and visitors don’t see the chat as offline when one person is unavailable.
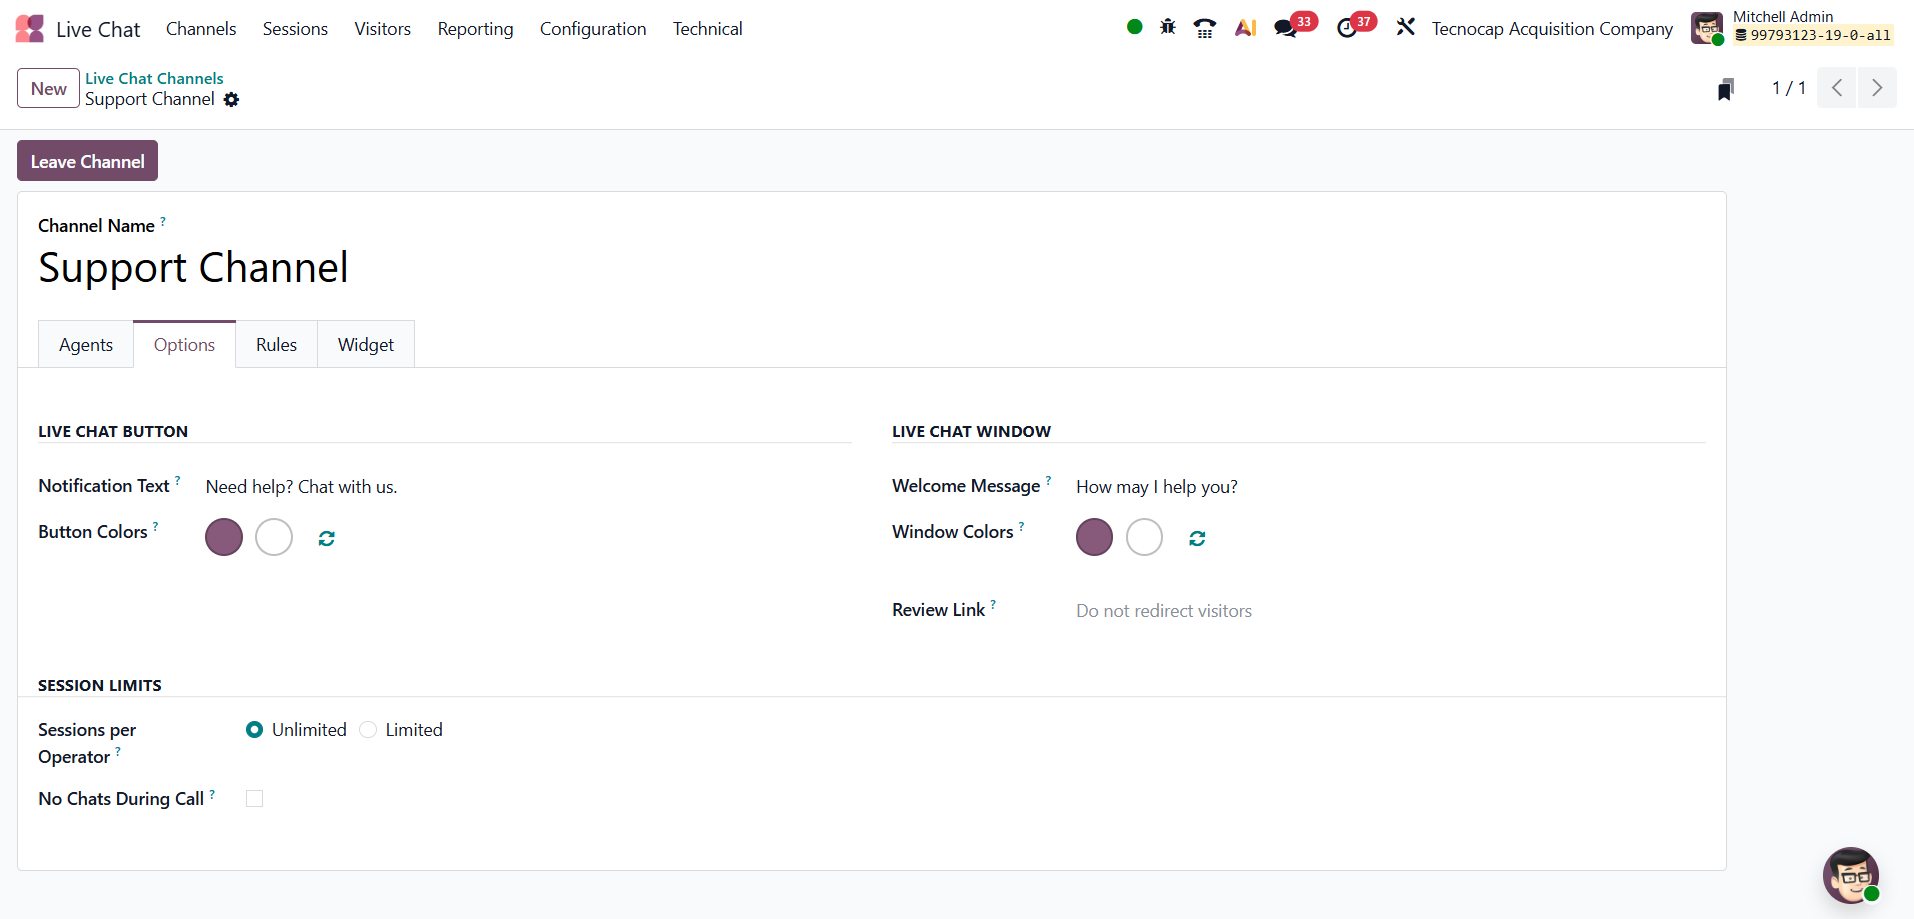
The Options tab is where you control how visitors first experience your live chat. The Welcome Message is the first text they see when the chat opens, so a short and friendly line works best. The Chat Input Placeholder appears inside the message box and gently guides users on what to type, which helps them start the conversation without hesitation. The Notification Text is the small prompt on the website that lets visitors know support is available without disturbing their browsing.
The Session Limits define how many chats an operator can handle at once. Setting a reasonable limit is important — too many active chats slow down replies, while too few can leave visitors waiting. You can keep it Unlimited for experienced teams or set a Limited number for better focus. The No Chats During Call option prevents new chats from being assigned to operators who are already on a call, helping them manage conversations more effectively.
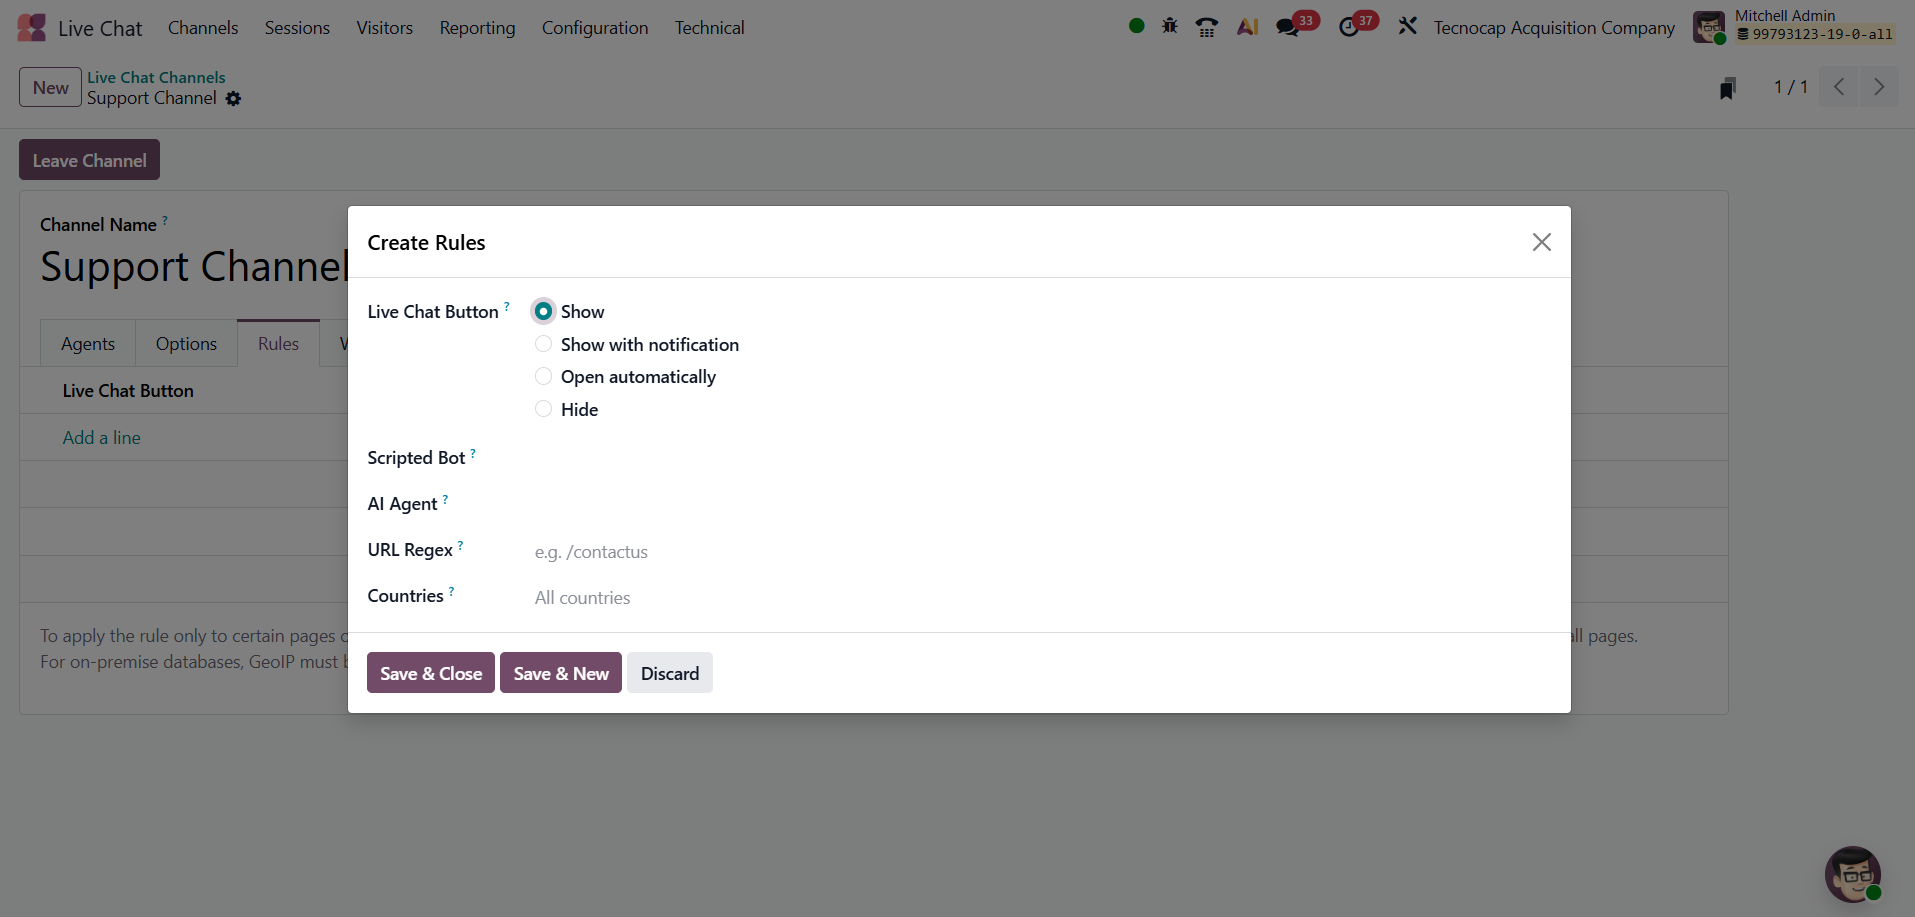
Rules allow you to control when and where the live chat widget appears on your website. Instead of showing the chat button everywhere, you can decide how it behaves based on your needs. The Button Visibility setting gives you four options. If you choose Show, only the chat icon appears and visitors can click it whenever they want help. Show with Notification displays the button with a small alert indicator, gently letting visitors know that support is available. With Open Automatically, the chat window opens as soon as someone lands on the page, which can be useful on important pages but may feel distracting if used everywhere. The Hide option completely removes the chat widget for selected pages or conditions. Using these settings carefully helps you balance visibility without overwhelming your visitors.
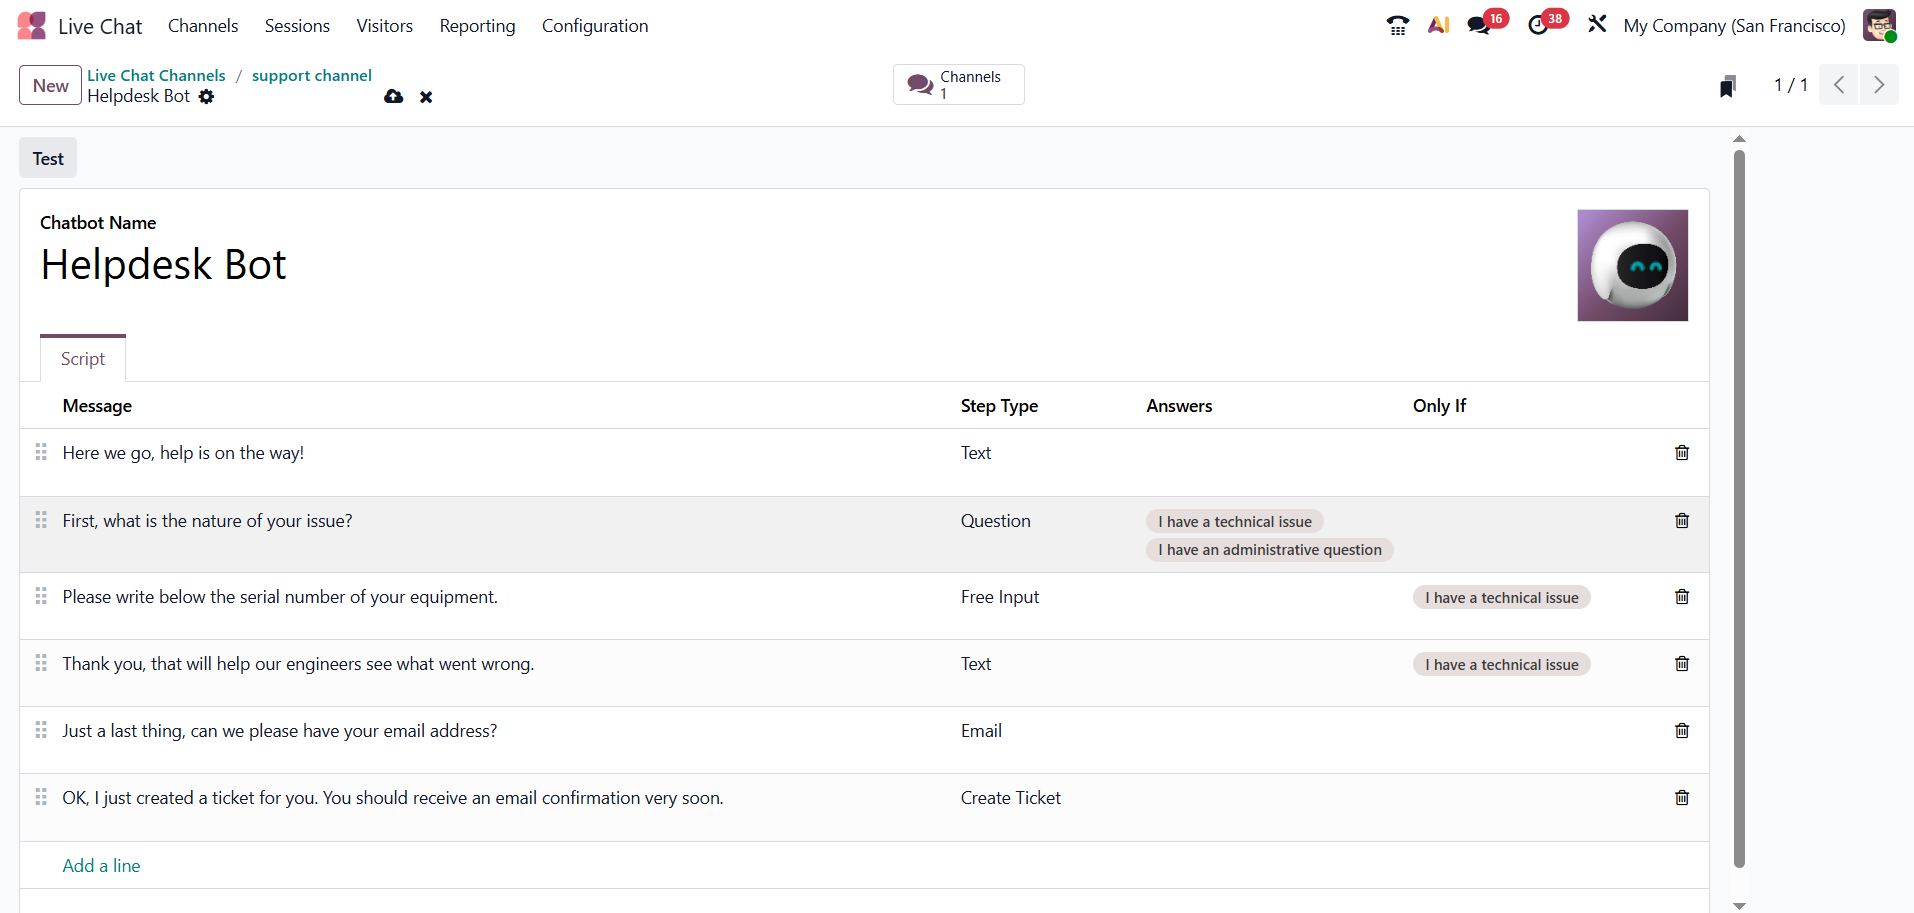
After completing the channel setup, you will notice a Chatbot smart button on the channel form. This appears at the top of the screen and allows you to add automated chat flows to the same live chat channel.
When you click the Chatbot smart button, you can create and manage scripts. These scripts define how the chatbot responds to visitors step by step. For example, you can set up automatic greetings, ask predefined questions, collect basic information like name or email, and guide users before transferring the conversation to a human operator.
In real use, chatbots are helpful for handling common questions or filtering requests before they reach your support team. This reduces repetitive work and allows operators to focus on more specific or complex queries.
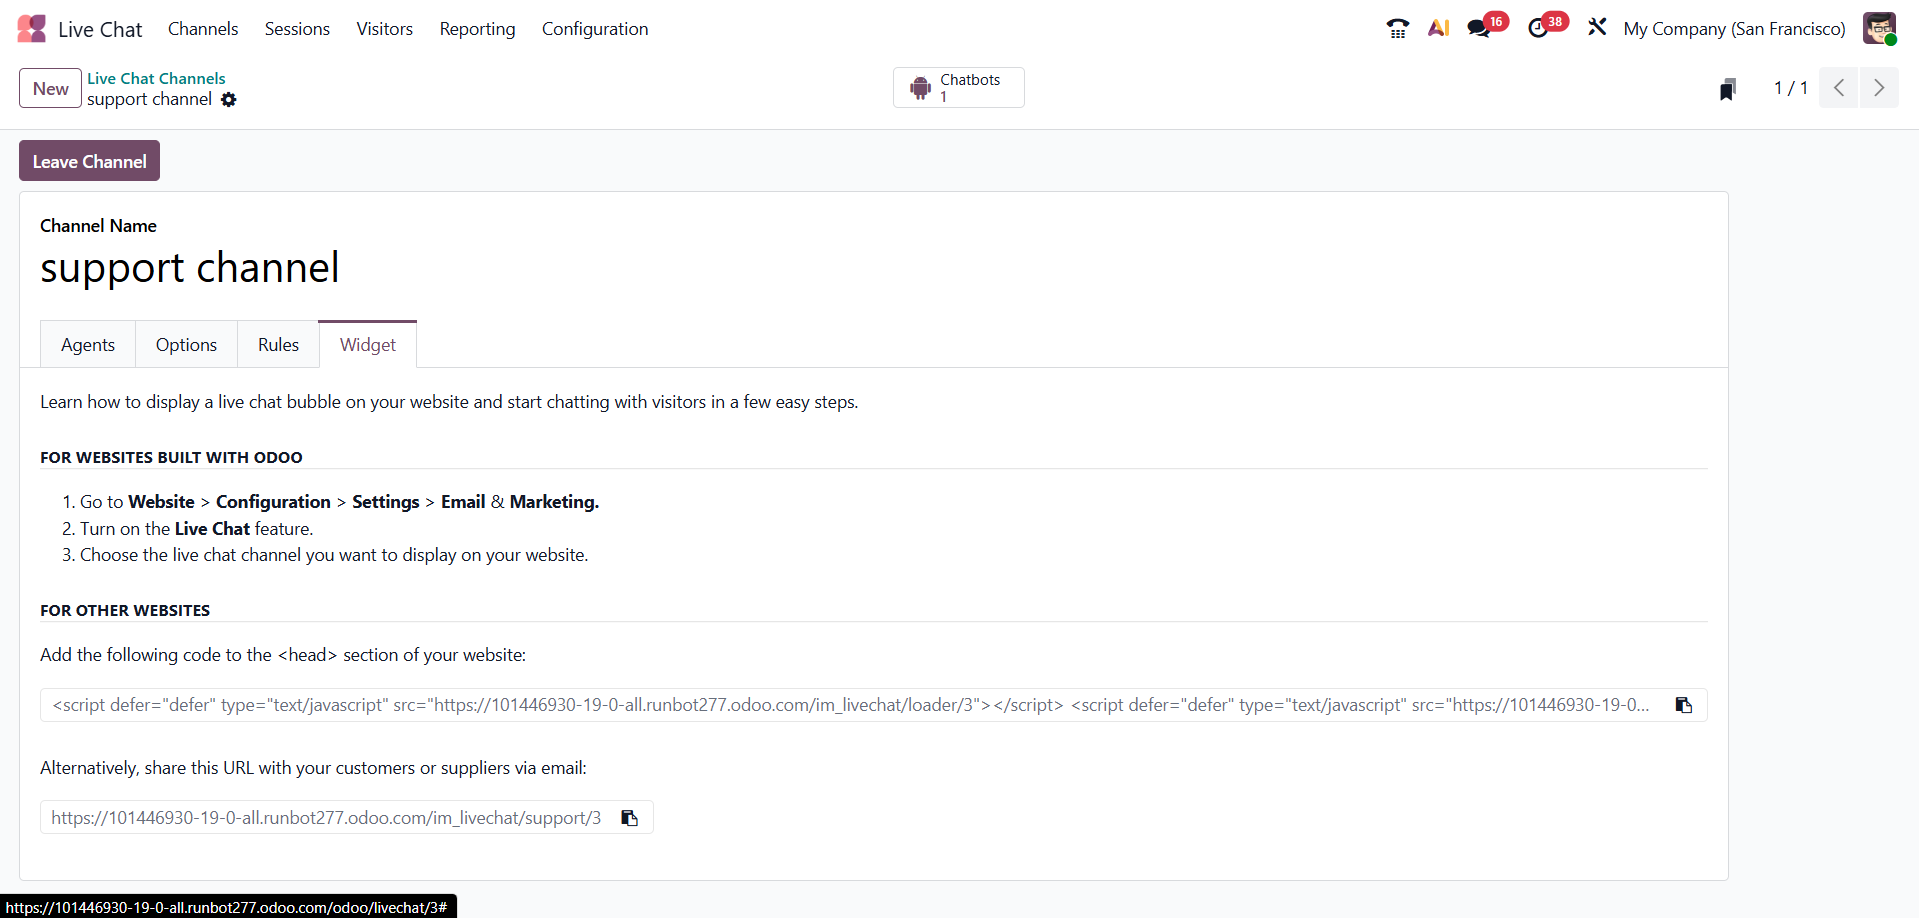
After finishing the channel configuration, click Go to Website to check how the live chat appears on your site. This step is important because it lets you see the widget from a visitor’s point of view before making it fully active.
If everything looks correct, you can publish the channel so it becomes available to your website visitors. Once it is live, users will see the chat button on the site. When they click it, the Welcome Message appears along with the Chat Input Placeholder, guiding them to type their question and begin the conversation without confusion.
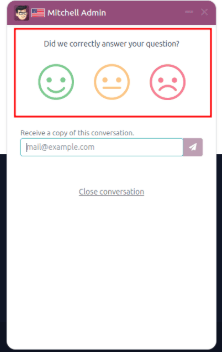
When a conversation is closed using the “X” button, Odoo can automatically ask the visitor to rate the chat. At that moment, a small feedback window appears where the user can share their experience. These ratings are very useful in day-to-day operations because they show how satisfied visitors are and help you identify where your support process can improve.
For operators, Odoo also provides slash ( / ) shortcuts inside the chat window. By pressing the / key, a list of quick commands appears. These are typically used for sending predefined responses or performing common actions without typing everything manually. In a busy support environment, this saves time, keeps replies consistent, and helps agents handle conversations more smoothly.

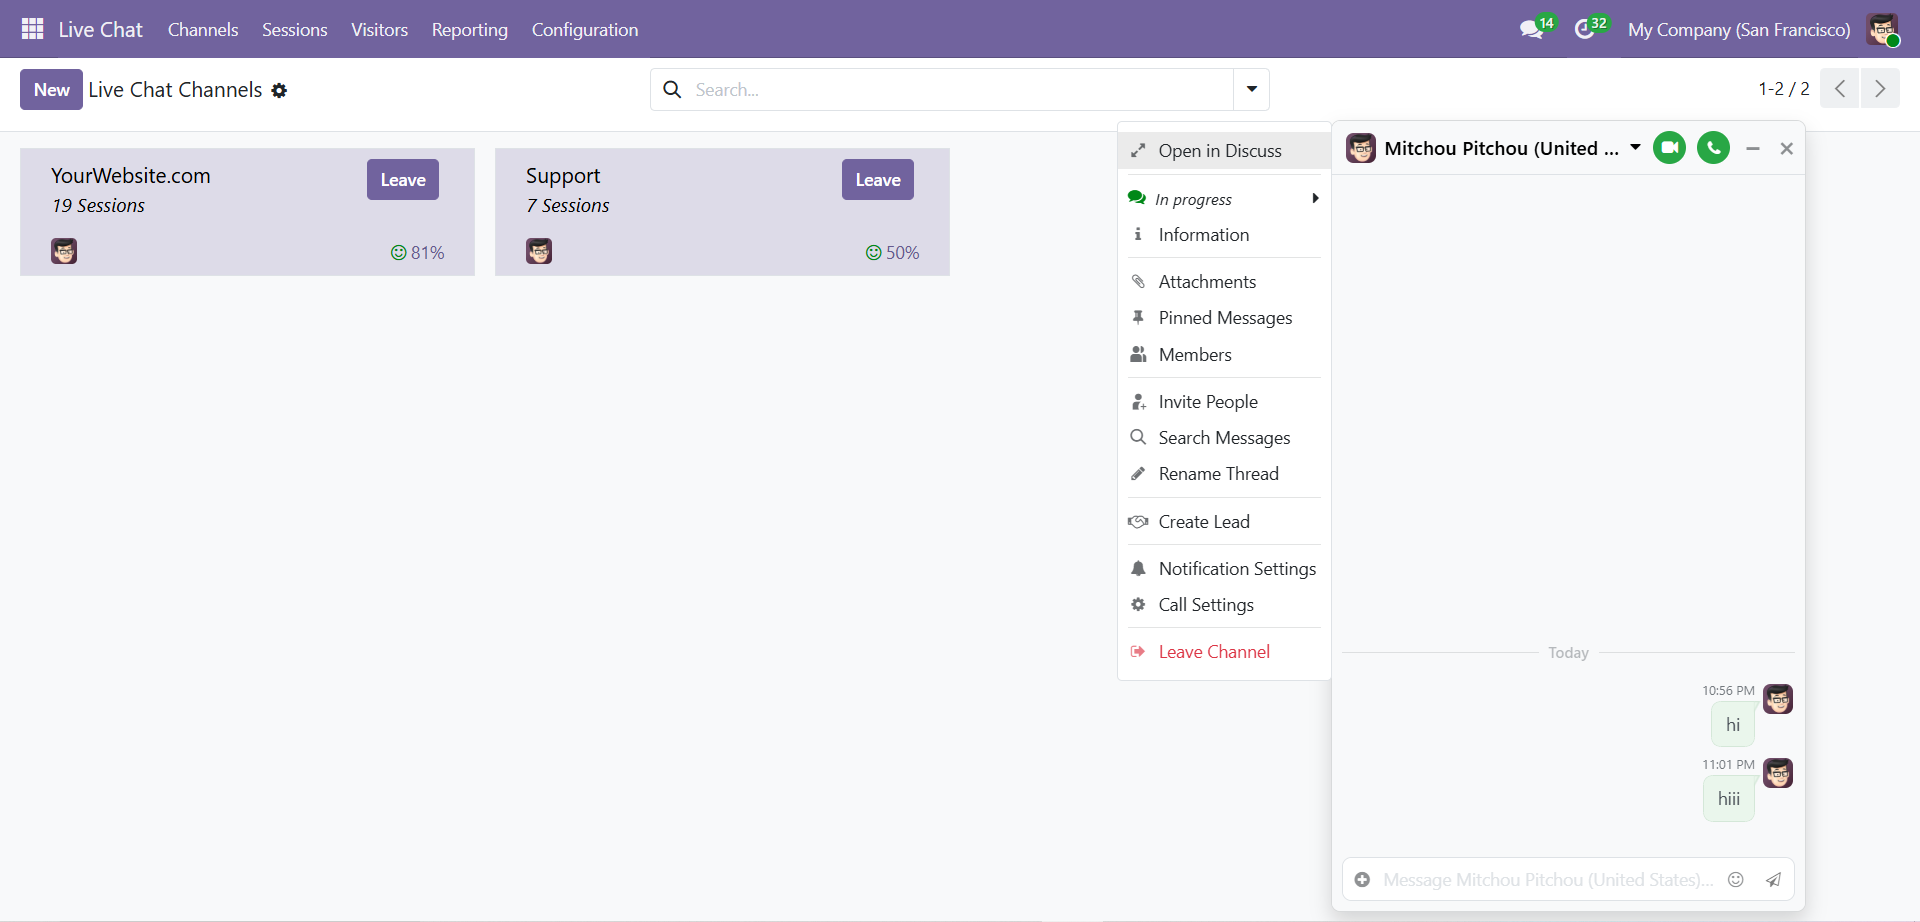
Inside the Live Chat window, the dropdown menu lets operators manage the conversation without leaving the chat screen. They can open the discussion in Discuss for better tracking, view visitor details, upload attachments, pin important messages, and search within the conversation. It also allows them to invite another user when a query needs additional input and rename the chat for easier organization.
A very practical option here is the ability to create a lead directly from the conversation, so potential opportunities are not lost. Operators can also control their notification and call settings from the same menu. These tools help keep conversations clear, organized, and easy to handle during daily support work.
The chat window can be closed at any time by clicking the “X” icon in the top corner. This is a small detail, but it gives visitors a clear and familiar way to exit the conversation without confusion. A simple and predictable interaction like this makes the chat feel comfortable to use.
With this, the basic setup and working of Live Chat in Odoo 19 is complete. You now have a channel connected to your website, operators assigned to handle conversations, and the key options configured to control how the chat appears and behaves.


1