How to Configure Accrual Plans in Odoo 19 | PTO Setup Guide
ArchanaAug. 31, 2026
Managing employee leave efficiently is an essential part of every organization's HR process. While some leave types are allocated manually in a single lump sum, others are earned gradually based on company policies, working hours, or employee tenure.
Odoo 19 Time Off simplifies this process through Accrual Plans, allowing organizations to automatically calculate and grant leave based on predefined rules—eliminating manual tracking and reducing administrative overhead.
In this guide, we will walk through how Accrual Plans work in Odoo 19 and provide a step-by-step walkthrough to set them up for your organization.
What is an Accrual Plan?
An Accrual Plan automatically grants leave to employees incrementally over time rather than allocating their entire leave balance at once.
Example: Instead of granting an employee 24 vacation days on January 1st, a company policy might allow them to earn 2 days at the end of every month. Odoo tracks, calculates, and updates these balances automatically in real time.
Practical Scenario
Consider a company with the following policy:
Employees earn 1 vacation day every month.
Leave accrual begins after 1 year of employment.
Unused leave can be carried over up to a maximum of 10 days.
Odoo 19 handles every aspect of this rule set automatically once configured.
Step-by-Step Guide: Configuring Accrual Plans in Odoo 19
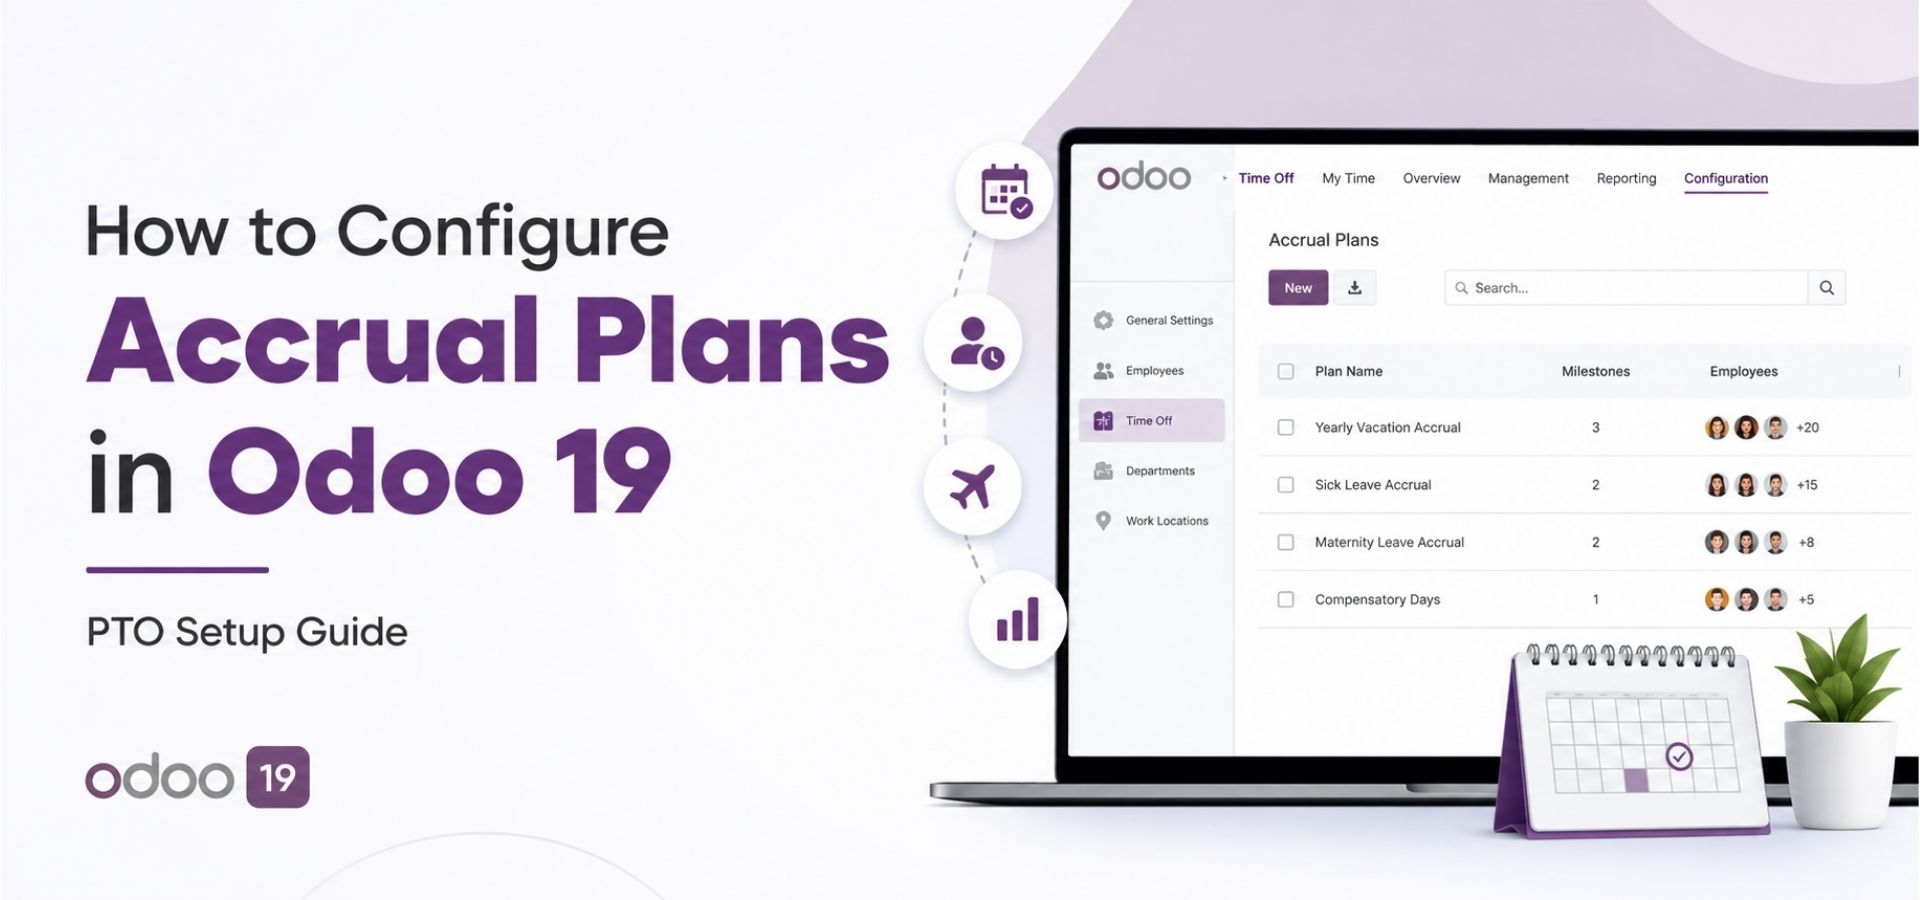
Step 1: Navigate to Accrual Plans
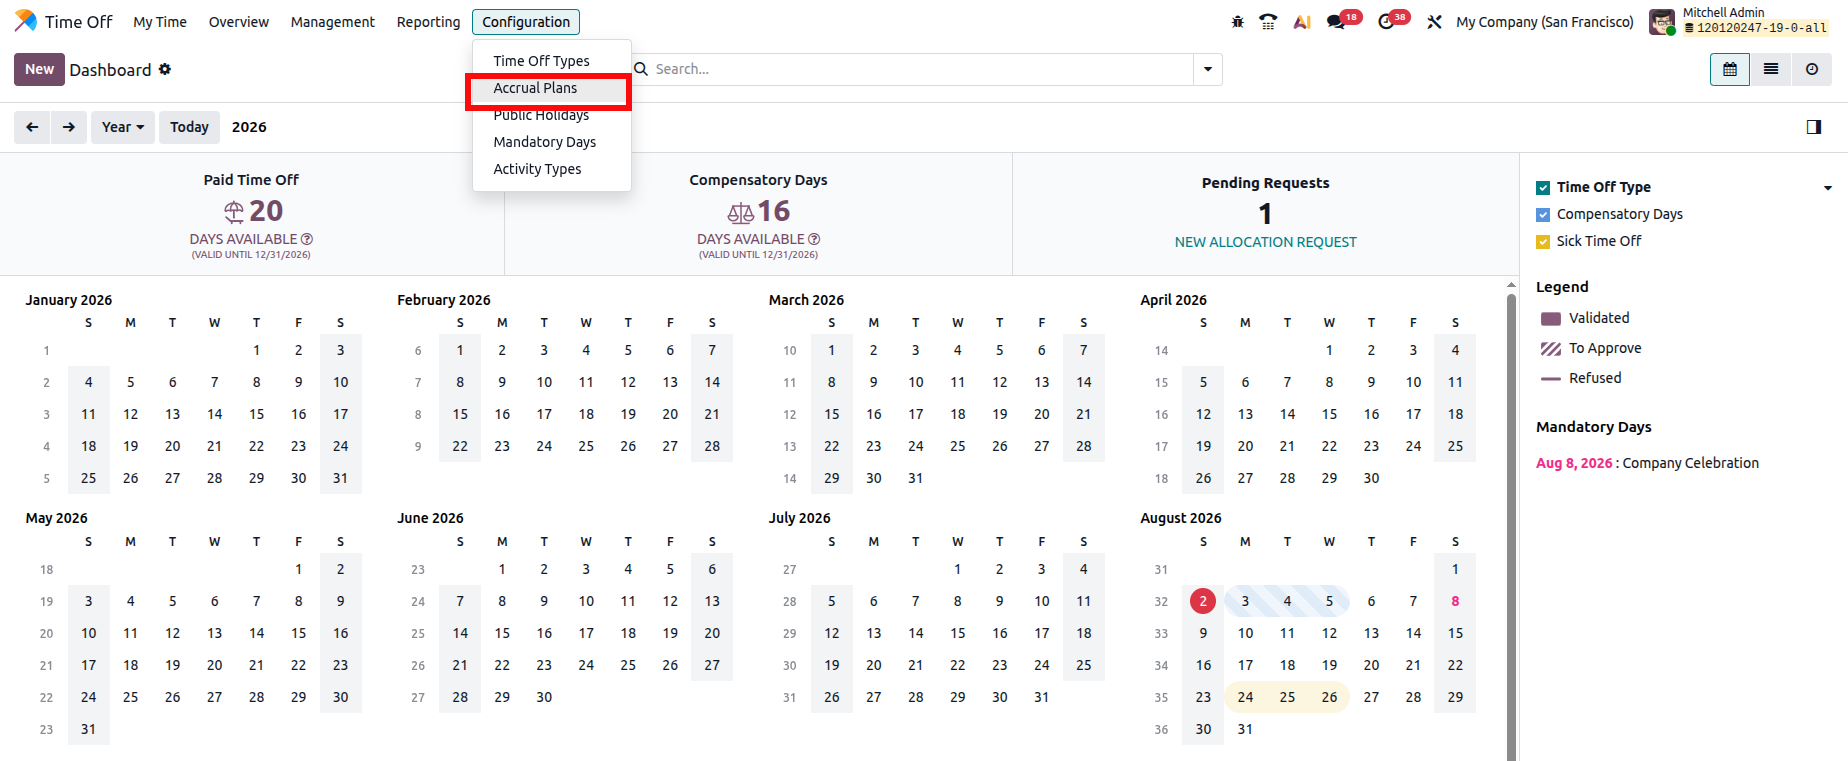
Open the Time Off app.
Go to Configuration -> Accrual Plans.
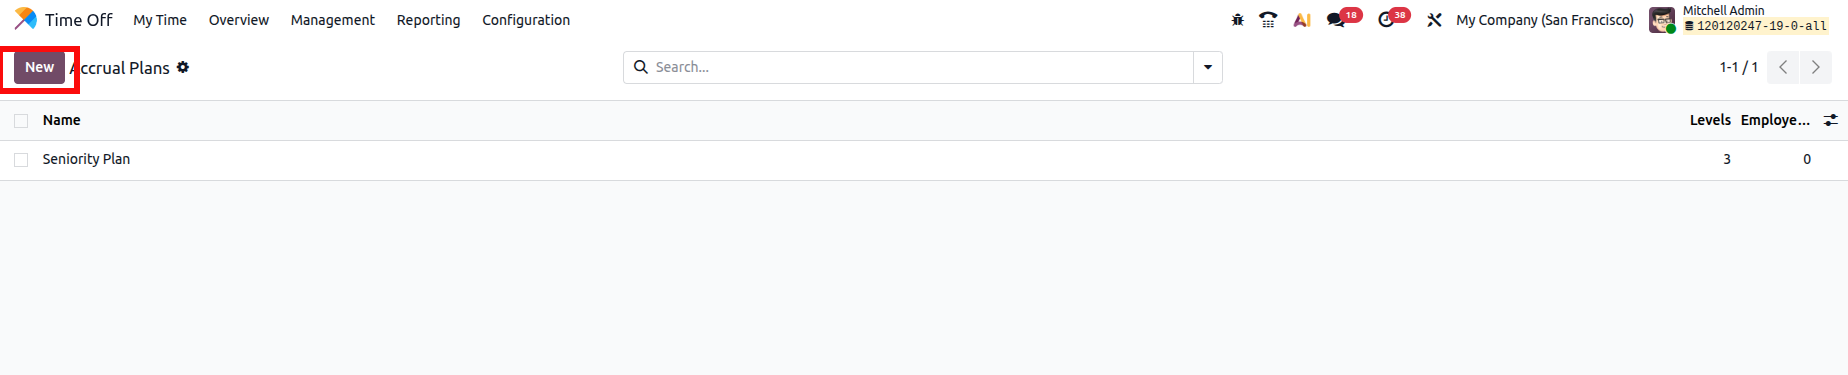
You will see a list of all existing accrual plans, including:
Plan Name
Number of Milestones
Employees actively assigned to the plan
Click New to create a new plan.
Step 2: Set Basic Information
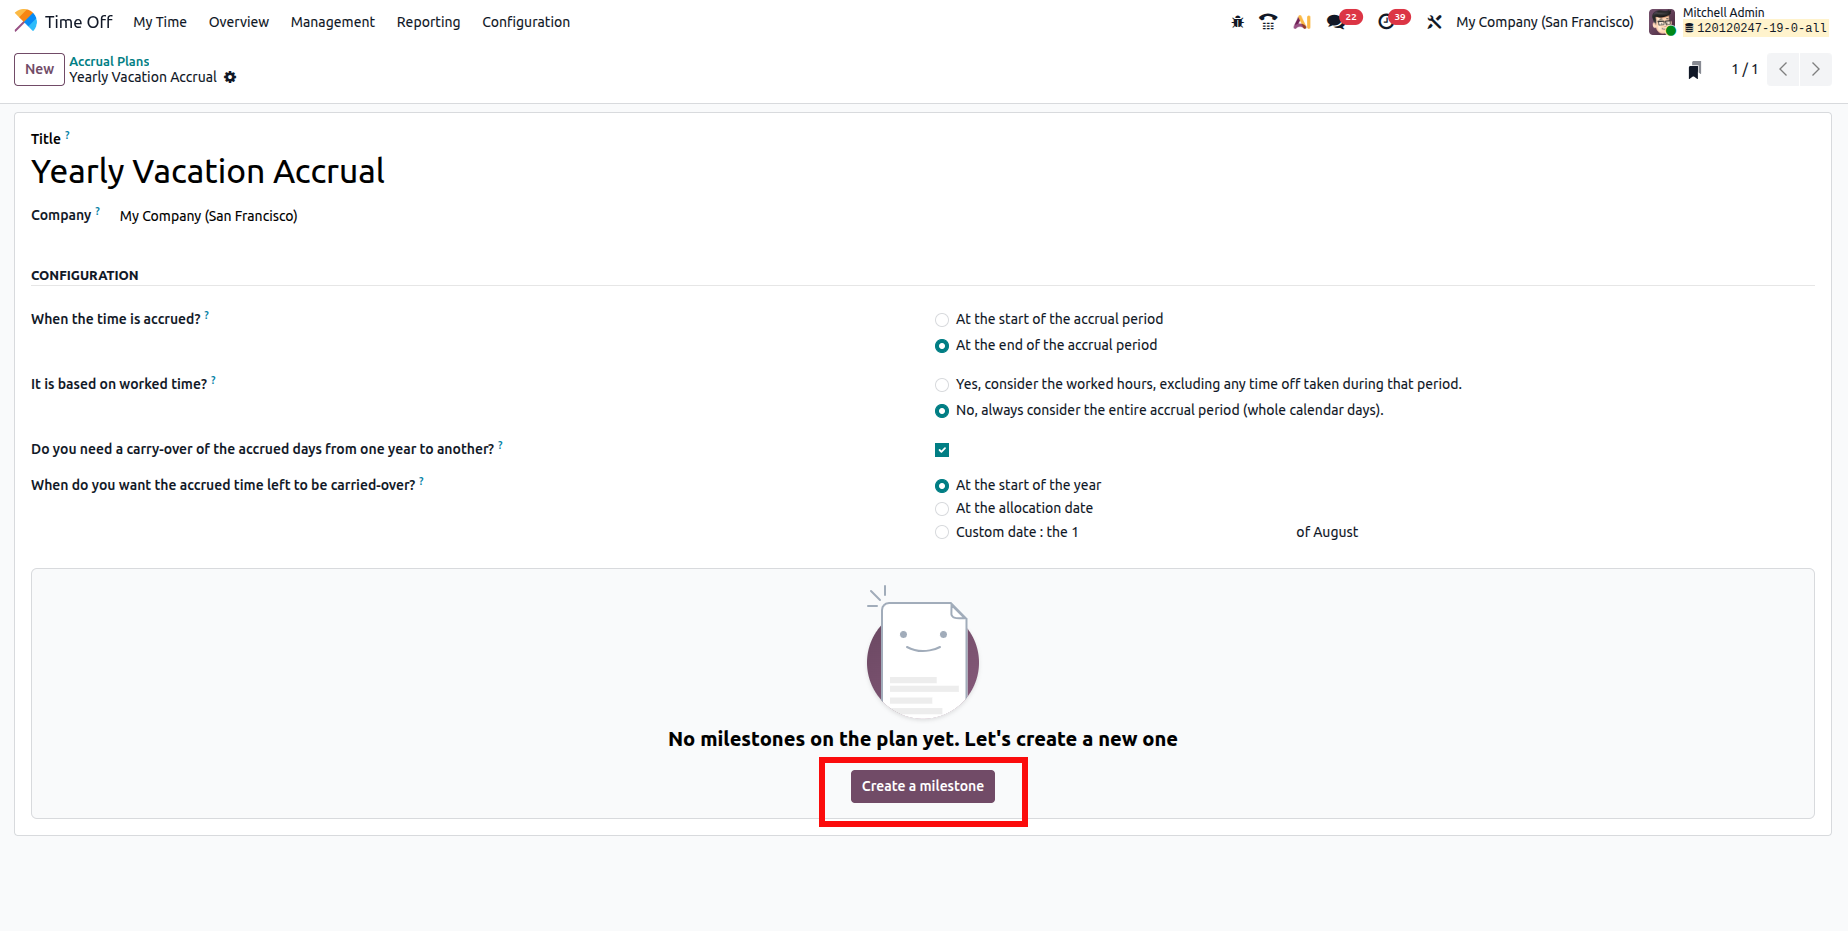
On the Accrual Plan configuration form, define the foundational settings:
Title: Name your plan clearly (e.g., Standard Paid Leave - Seniority Based).
Company: Select the appropriate company if operating in a multi-company environment. Leave this field blank to make the plan available across all companies.
Step 3: Configure Accrual Rules
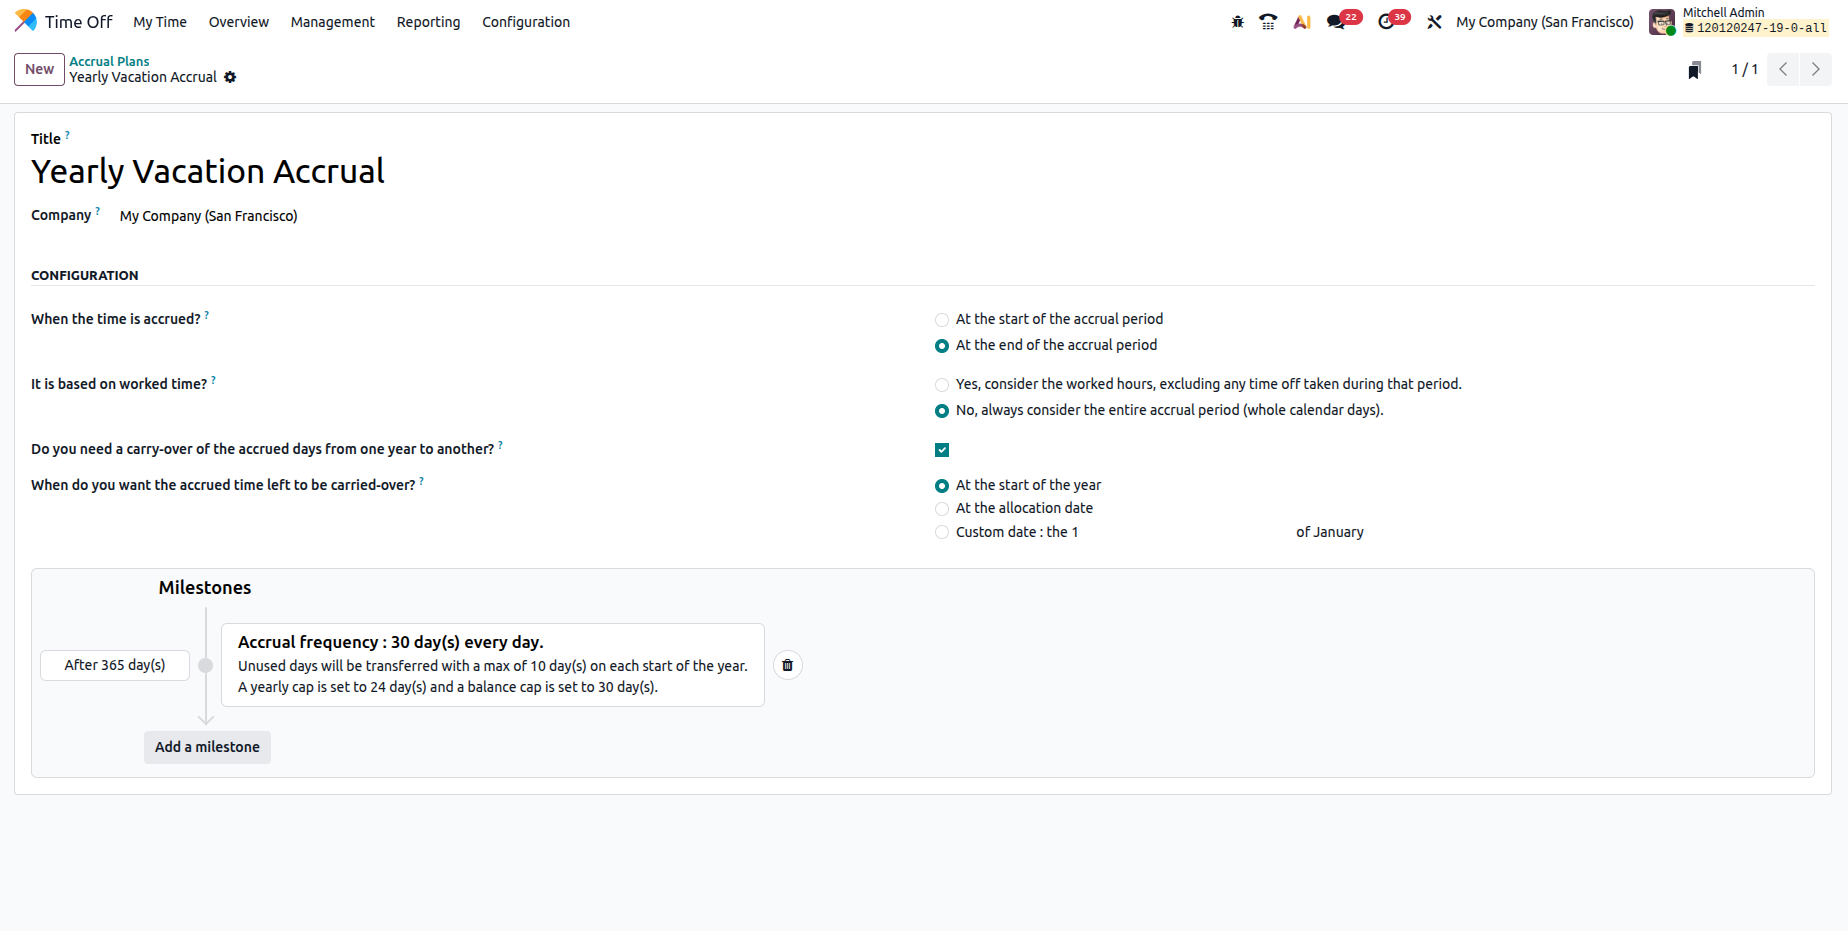
The Configuration section dictates how and when leave is earned:
1. When is the time accrued?
At the start of the accrual period: Employees receive their leave upfront on the first day of the cycle.
For a monthly accrual of 2 days, the employee receives their full 2 days on the 1st day of each month (e.g., receiving January's leave on January 1st).
At the end of the accrual period (Recommended): Employees earn leave only after completing the designated cycle.
Example: For a monthly accrual, leave is credited on the last day of the month.
2. Is it based on worked time?
Yes: Accrual calculations are linked directly to actual worked hours/days. If an employee takes unpaid leave or has unauthorized absences, their accrued balance decreases proportionally.
No: Accruals follow standard calendar periods regardless of working time, weekends, or unpaid absences. (Ideal for fixed annual leave policies).
Step 4: Configure Carry-Over Rules
To manage unused leave carried into the next calendar or policy year, enable "Do you need a carry-over of accrued days?" and choose your transition trigger:
The carry-over options can be categorized into three main methods:
At the Start of the Year: Transfers unused leave automatically every year on January 1st.
At the Allocation Date: Transfers leave based on each employee's individual anniversary or hire date.
Custom Date: Sets a specific date (such as August 1st) for company-wide leave carry-over.
Step 5: Define Milestones & Rules
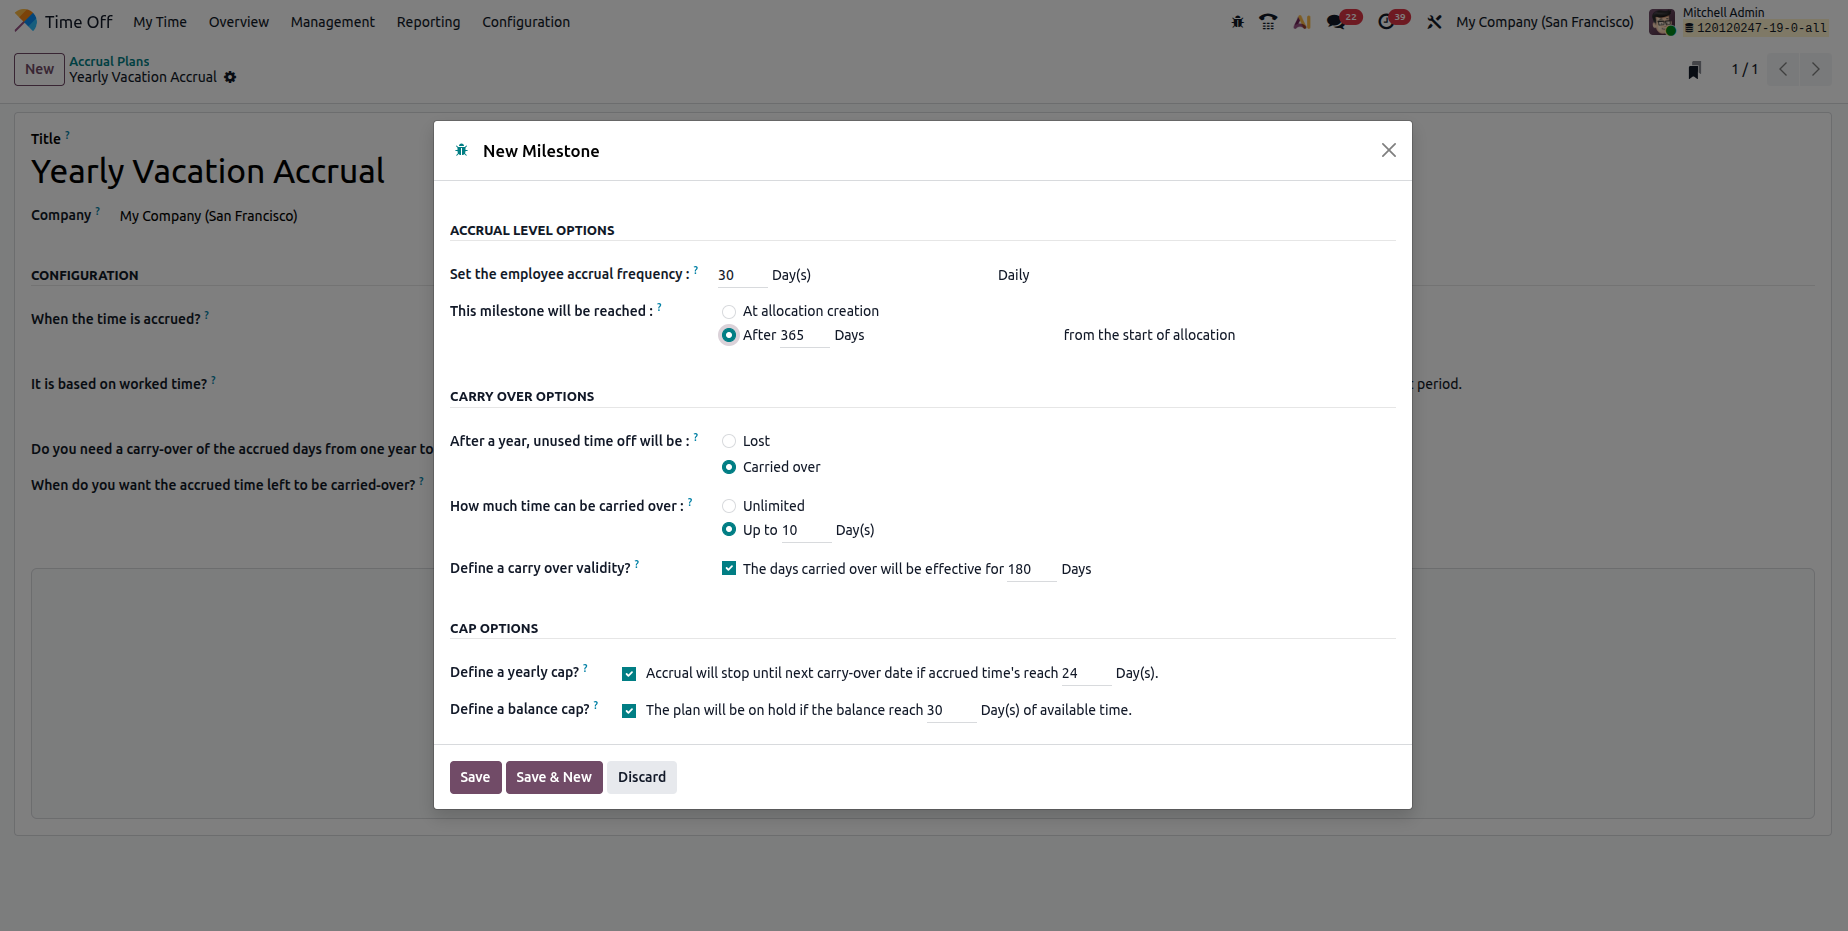
Accrual Plans require Milestones to function. Milestones define when accrual starts, how much is earned, and cap limits.
Click Create a Milestone to configure the following settings:
A. Accrual Level & Frequency
Amount & Unit: Define how much time is earned (e.g., 1 Day or 8 Hours).
Frequency Options: Choose how often leave accrues: Hourly, Daily, Weekly, Monthly, Twice Monthly, Twice Yearly, Yearly, or Per Hour Worked.
Milestone Reached:
Select At Allocation Creation to begin accruing leave immediately.
Select After Specific Time (e.g., After 365 Days) for probation periods or tenure-based rewards.
B. Carry-Over & Expiration Controls
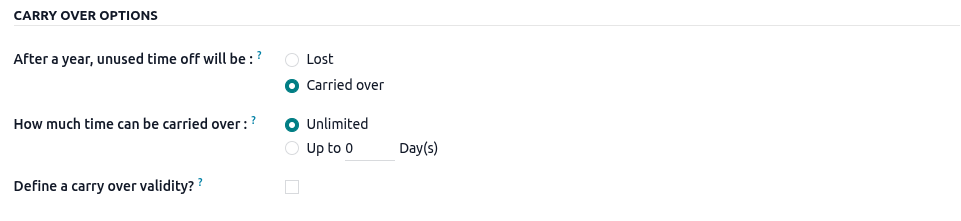
Lost: Unused leave expires at the end of the transition period.
Carried Over: Unused leave rolls forward into the next period.
Carry-Over Limit: Choose Unlimited or cap it (e.g., Up to 10 Days).
Carry-Over Validity: Set an expiration period for carried-over days (e.g., 180 Days). If unused within six months, the carried-over balance expires automatically.
C. Accrual Caps
Prevent excessive leave accumulation using hard limits:
Yearly Cap: Maximum leave an employee can earn in a single calendar year (e.g., 24 Days).
Balance Cap: Maximum total leave balance allowed at any given time (e.g., 30 Days). Accrual pauses automatically when this threshold is reached.
Click save.
You can add multiple milestones within a single Accrual Plan to automatically increase leave entitlements as employees gain seniority.
For instance, set your plan to grant 1 day/month for employees with 0–3 years of service, automatically bump it to 1.5 days/month once they reach 3 years, and increase it to 2 days/month after 5 years. Odoo transitions employees across these tiers automatically based on their hire date
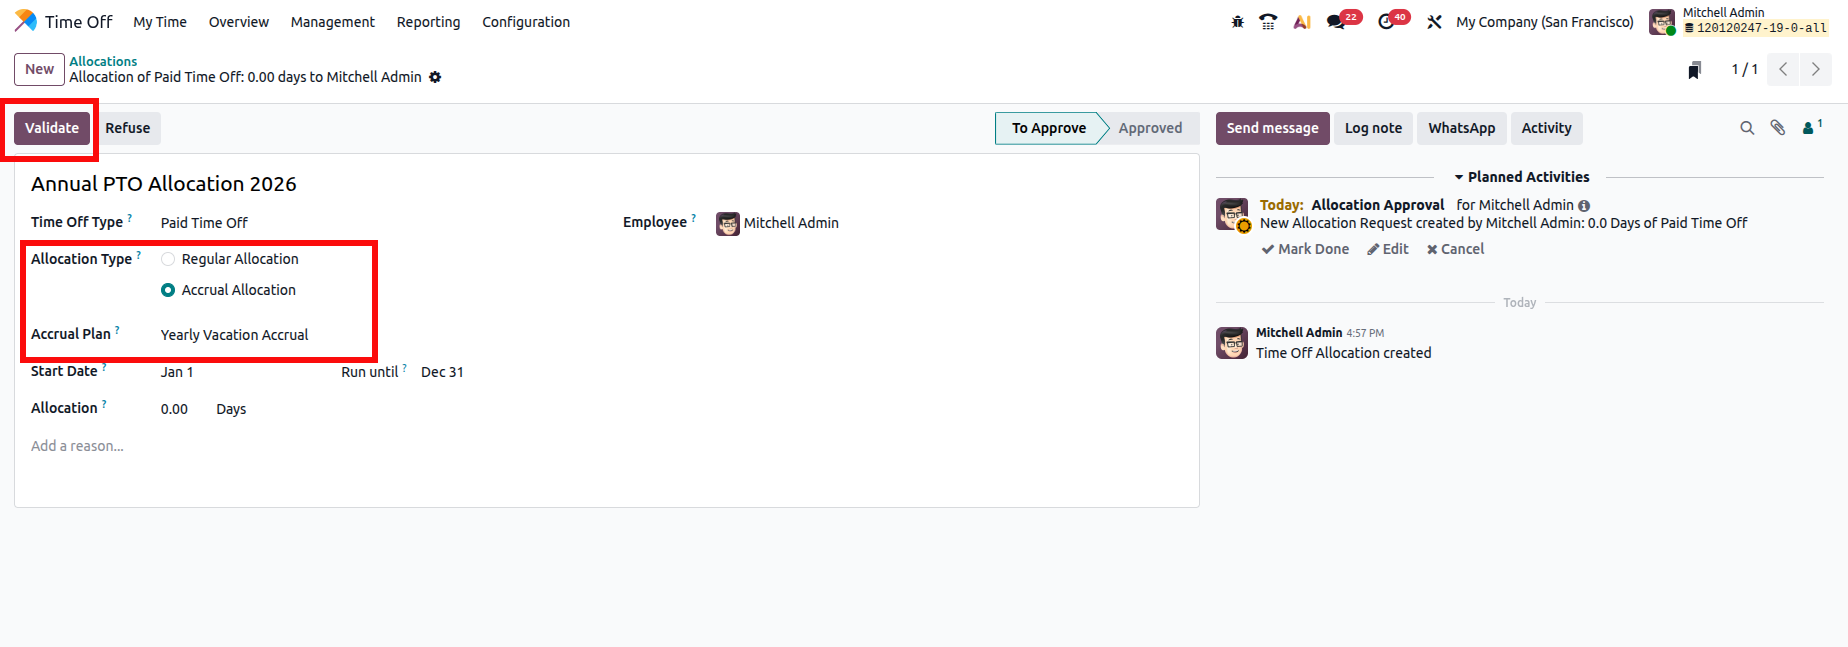
Step 6: Assign Accrual Allocations to Employees
Creating an accrual plan defines the logic, but you must link it to employees to activate it.
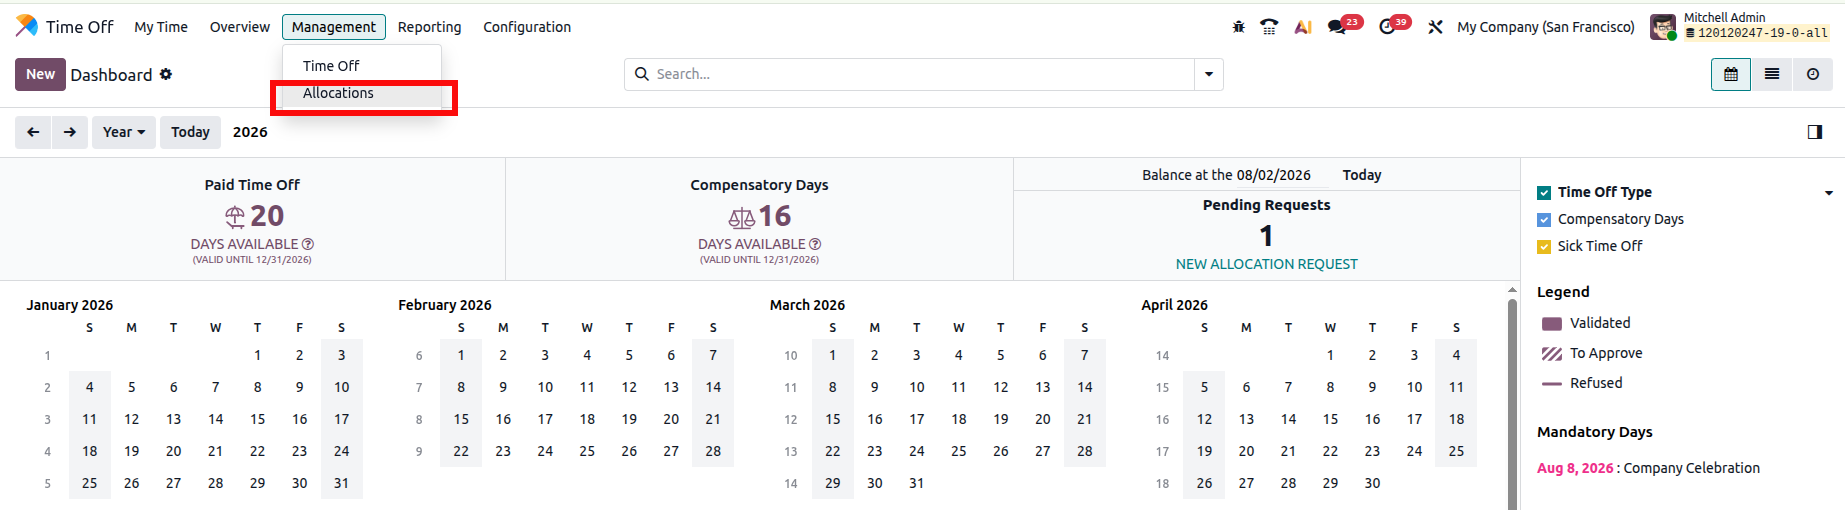
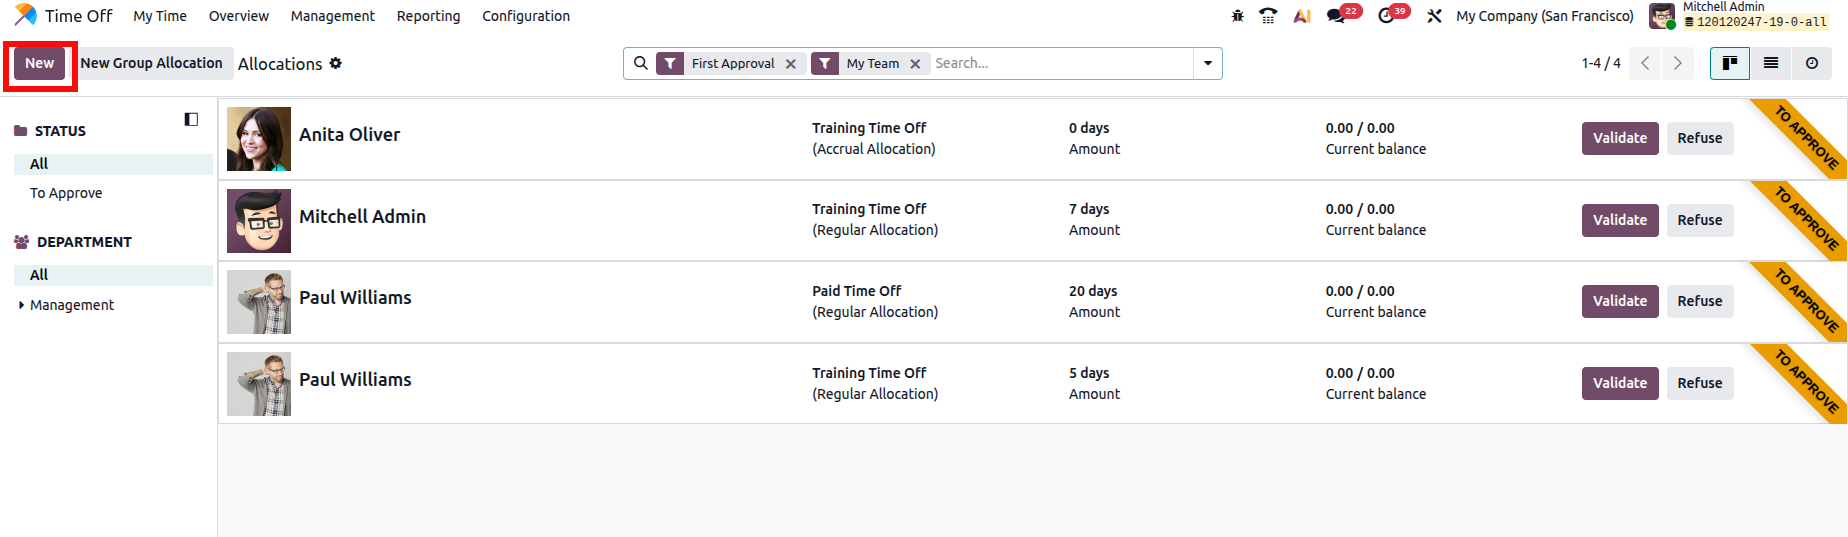
Go to Time Off -> Management -> Allocations.
Click New.
Select Accrual Allocation .
Fill in the allocation details:
Employee: Select the target team member.
Time Off Type: Select the leave category (e.g., Paid Time Off).
Accrual Plan: Select the plan created in previous steps.
Start Date & Run Until: Define the plan's duration.
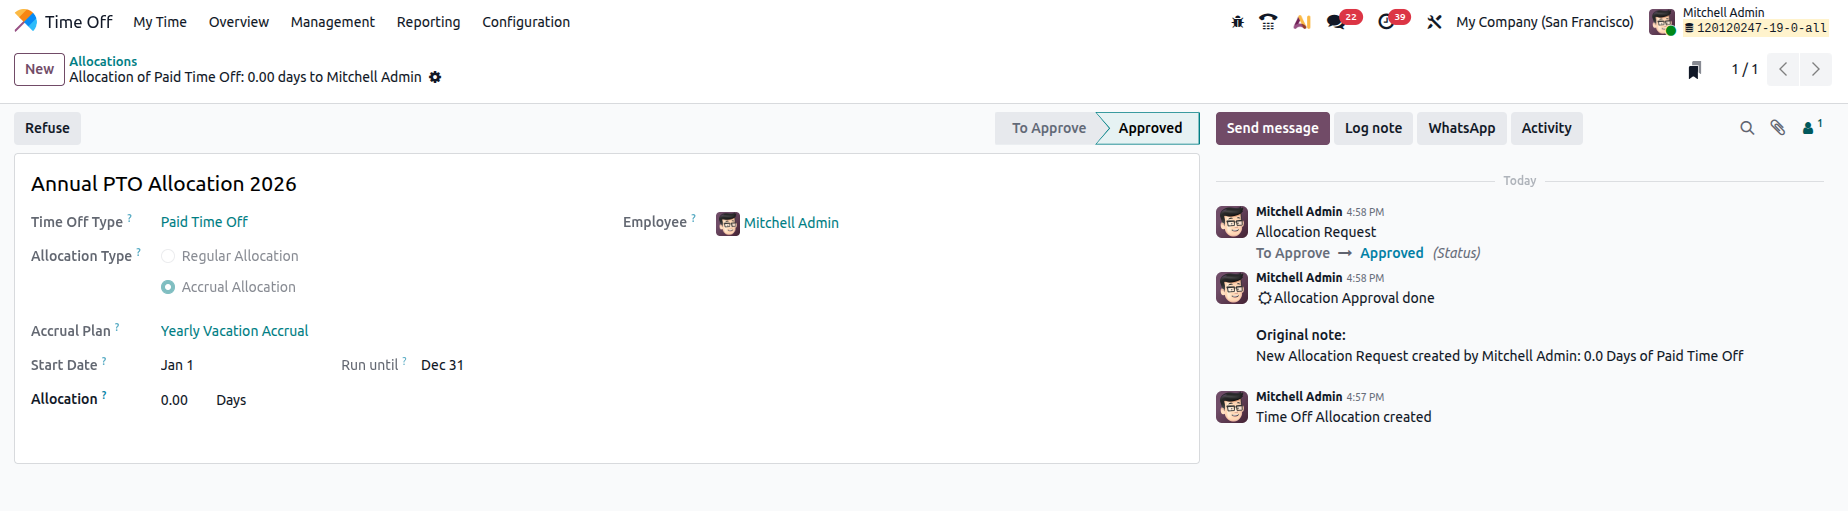
3. Click Save and then Validate.
Note: The initial balance may display 0.00 Days. Odoo will automatically populate and update the balance as accrual milestones and schedules are met.
Key Benefits of Odoo 19 Accrual Plans
Hands-Off Automation: Eliminates manual calculations and balance adjustments for HR teams.
Flexible Granularity: Accrue leave by hour, day, month, or actual worked hours.
Tiered Progression: Reward long-term employees automatically using tenure milestones.
Cap Controls: Protect against excessive liability with strict yearly and total balance caps.
Employee Transparency: Gives staff clear, real-time visibility into earned leave and carry-over expiration dates.
Final Thoughts
Odoo 19’s Accrual Plans combine flexibility with precision, enabling HR departments to implement complex leave structures effortlessly. By configuring accurate accrual schedules, carry-over rules, and balance caps, you maintain complete policy compliance while delivering a transparent experience for your workforce.













0