RahnaNov. 6, 2023
In real time, all invoice information is transferred from the Government portal einvoice1.gst.gov.in to both the GST portal and the e-way bill portal. As a result, it eliminates the need for manual data entry for filing GSTR-1 returns and generating part-A of e-way bills because the information is transferred directly from the IRP to the GST site.
Odoo meets the e-Invoice system standards of the Indian Goods and Services Tax (GST). Odoo V 15 enterprise, V 16 enterprise now supports Indian e-invoicing.
Install the following modules to get all the features of the Indian localization:
1. Indian – Accounting Module
2. Activate Indian E-invoice Integration Module
After Installing these modules, default fiscal localization package feature & Indian e-invoicing integration feature will be updated .
For managing Indian E-Invoicing in Odoo Environment, need to ensure two steps,
1. Register NIC e-Invoice web portal
2. Configuration on Odoo
Registration on your NIC e-Invoice web portal
To access your API credentials, you must first register on the NIC e-Invoice web page.These credentials are required to configure your Odoo Accounting app.
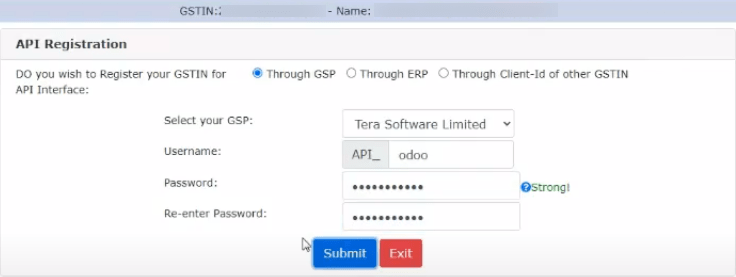
1. Login to the NIC e-Invoice web portal (https://einvoice1.gst.gov.in/) by using Username and Password.
2. Create API User from user credentials of API Registration from dashboard
3. OTP Verification
4. Select GSP & Click on Submit
Configuration on Odoo
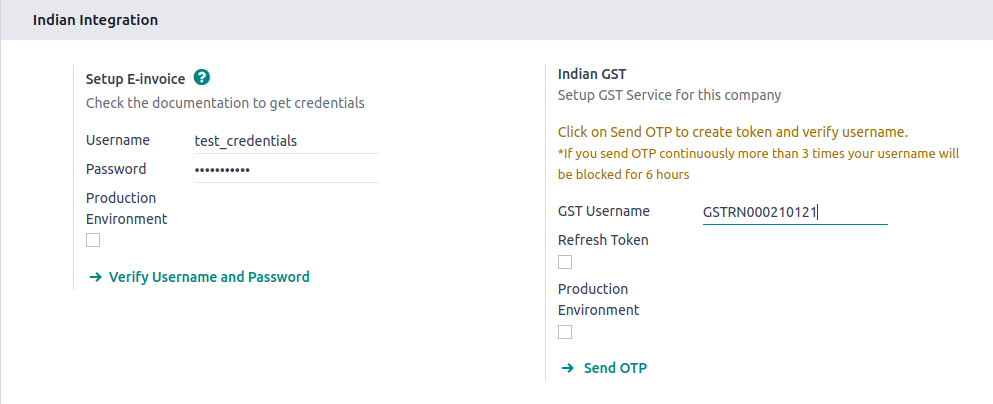
1. For E- Invoice configuration,
Accounting -> Configuration -> Settings -> Indian Electronic Invoicing, and & Logined with credentials
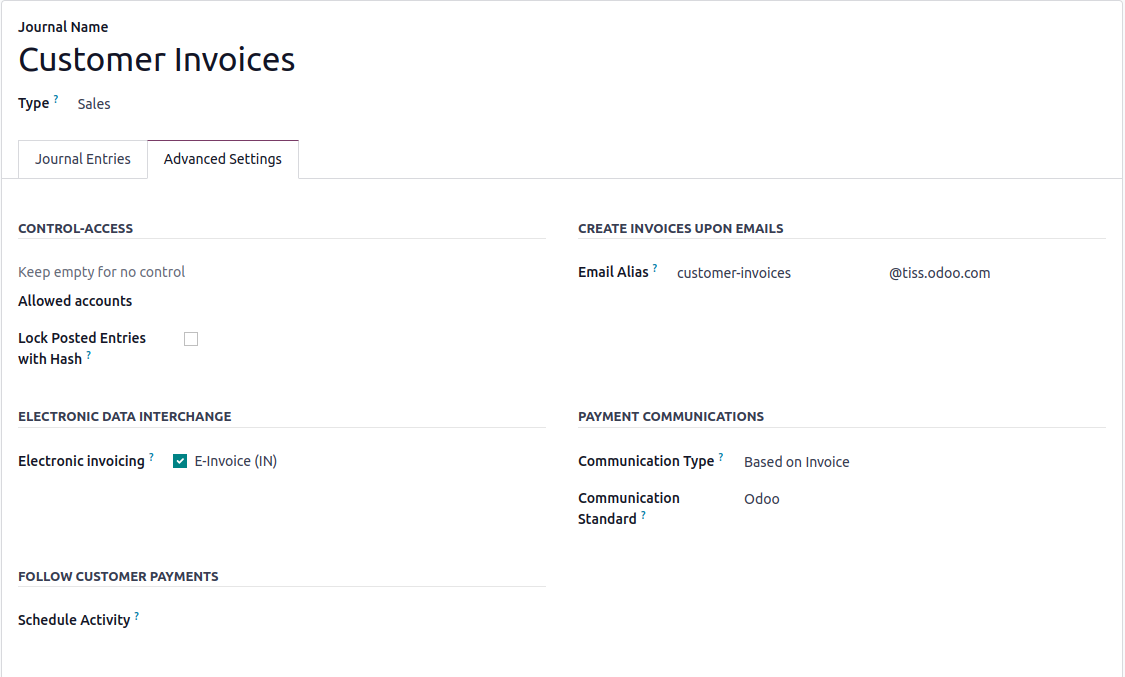
2. Journals Configuration
Accounting -> Configuration -> Journals - > Enable Electronic Invoicing in EDI
(Electronic Data Interchange) from Advanced settings
Workflow
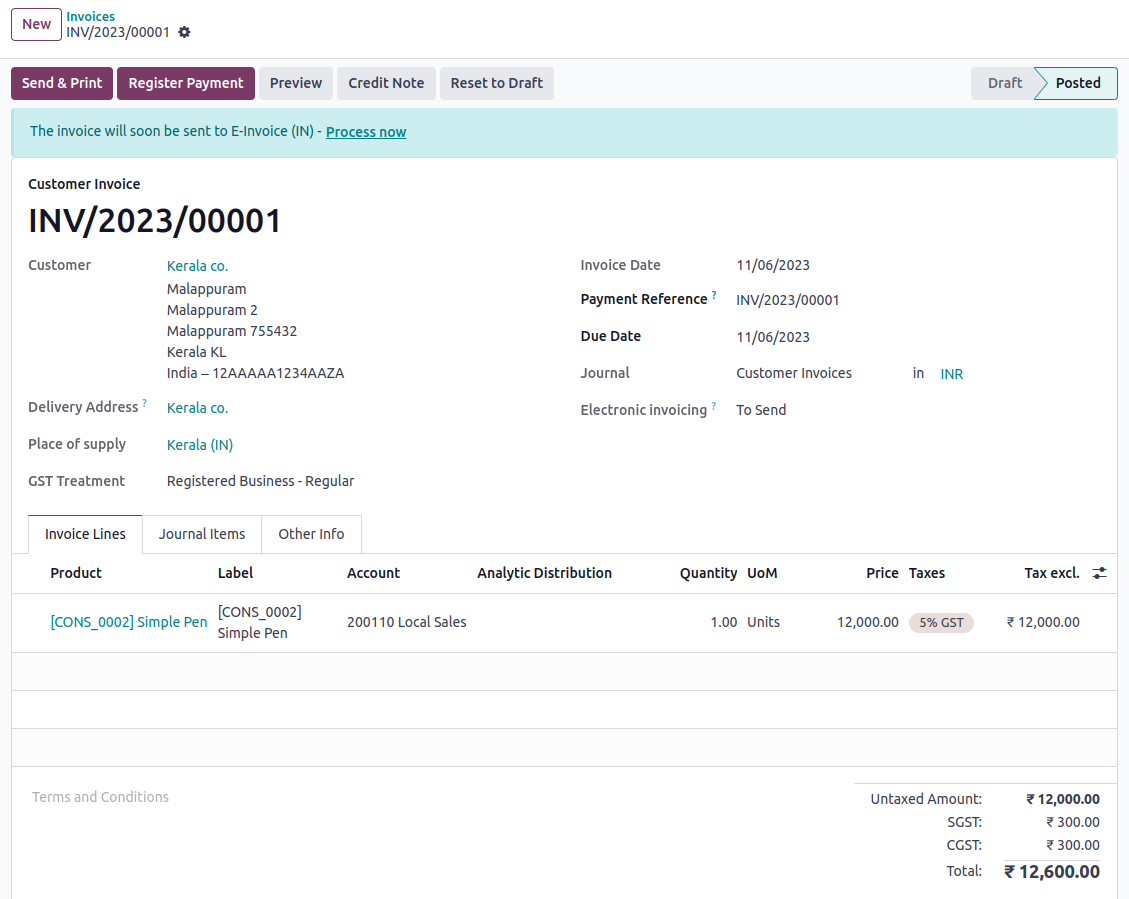
Invoices can be generated from Odoo either through direct entry from the Accounting module or through Sales Order. On validating the Invoice , a confirmation message appears at the top of the record. After a while, Odoo automatically sends the JSON-signed file to the government portal. If you wish to process the invoice right now, click Process Now.The JSON file is attached in the chat log of that record and can check the status from EDI Tab / Electronic Invoicing field. You can print the invoice PDF report when it has been submitted and confirmed. The IRN, acknowledgment number and date, and QR code are all included in the report. They certify that the invoice is a valid fiscal document. To cancel an e-invoice, go to the invoice's Other info tab and fill out the Cancel reason and Cancel notes fields. Then, select the Request EDI Cancellation option. The Electronic invoicing field's status switches to To Cancel. Click on Call Off EDI Cancellation if you want to cancel before processing the invoice.
Verification of E-invoice from GST
You can also validate the signed invoice through the GST e-Invoice system website
after submitting an e-invoice.
1. Download the JSON file
2. Open Portal -> Search -> Verify Signed Invoice -> Select the JSON file & Submit
3. Can examine the verified Invoice with their data
This is how Indian E – Invoicing is working in Odoo 15 & 16 versions.


0